Plan a national park hike and follow the trail with spoken directions
A trail map shows you the whole park. On the trail, the question is which way at the junction. GPX Explore on iPhone answers both. You draw the hike with Follow Paths (Walking) and the route keeps to the trail by itself, switchbacks and all. Before you go you see the climbs and fly the trail in 3D. On the trail it tells you each turn out loud, so the phone can stay in your pocket with the screen off.
The example is a loop in Yosemite Valley. It starts at Happy Isles, goes up the Mist Trail past Vernal Fall to the top of Nevada Fall, and comes down the John Muir Trail by Clark Point: 6.2 miles. Check the park’s trail conditions before you go.
Drawing a route, the 3D view and following a route turn by turn need GPX Explore Pro. Recording a hike without a route is in the free app.
Draw the hike on the trail
- On the start screen, tap Draw a New Track. The Hybrid map style, in the map button’s menu, shows the trails over the rock and the trees.
- In the bar at the top of the map, tap the button for how lines are drawn and choose Follow Paths (Walking).
- Tap the trailhead, then a few points along the way you want to go: one on each trail you mean to take, and the top. Here it is eight taps: Happy Isles, two on the Mist Trail, the top of Nevada Fall, two on the John Muir Trail, the junction above the footbridge, and Happy Isles again.
Each tap asks Apple Maps for walking directions from the last point, so the line follows the trail’s switchbacks instead of cutting across the cliff. Where two trails go to the same place, a tap on the one you want picks it. After each tap the panel shows that one point. When the last leg has landed and Finding a route… is gone, tap its × and the track’s panel shows the length (6.24 miles here).
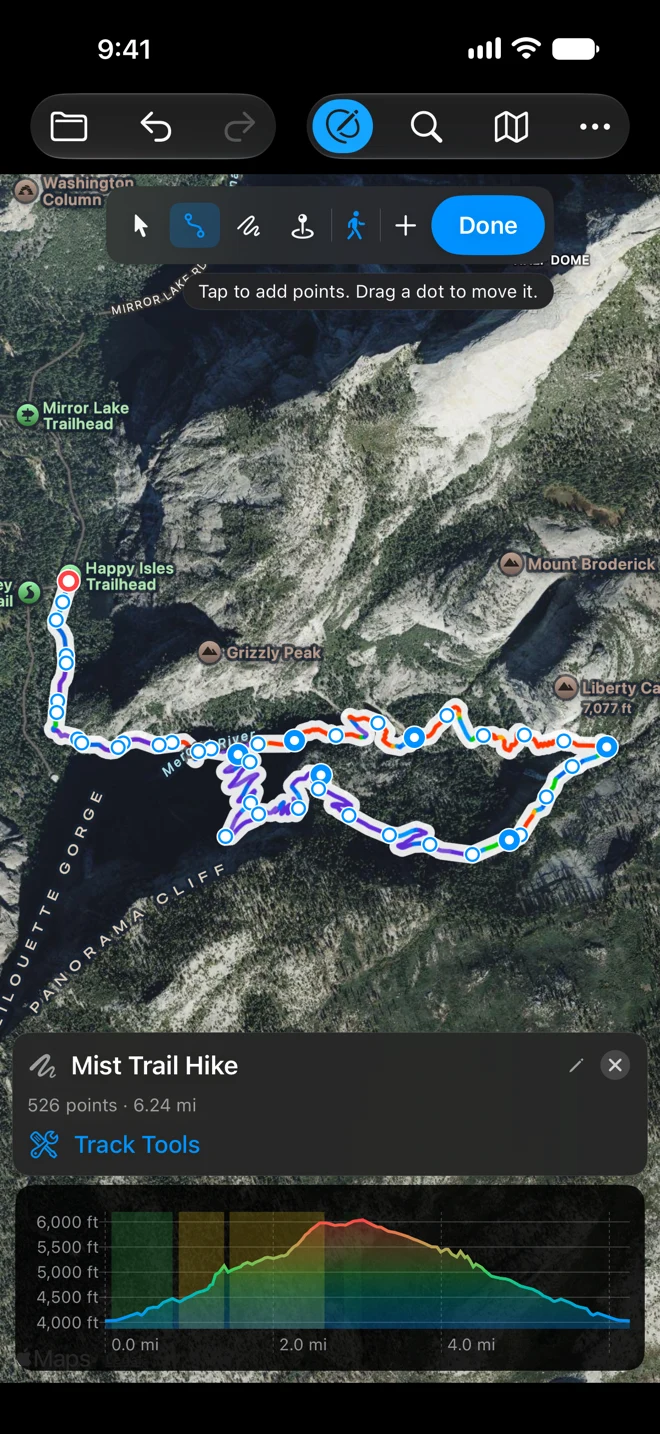
Every point gets its height from our terrain model as you draw. That model has a point every 30 meters, so on a trail cut into a cliff, like this one beside the waterfalls, the climbing it adds up reads high: here it comes to more climbing than the trail has. A recording of your hike gives its own figure from the phone’s GPS heights, which have errors of their own, so treat both as estimates. See Accuracy.
See the climbs, then fly the trail
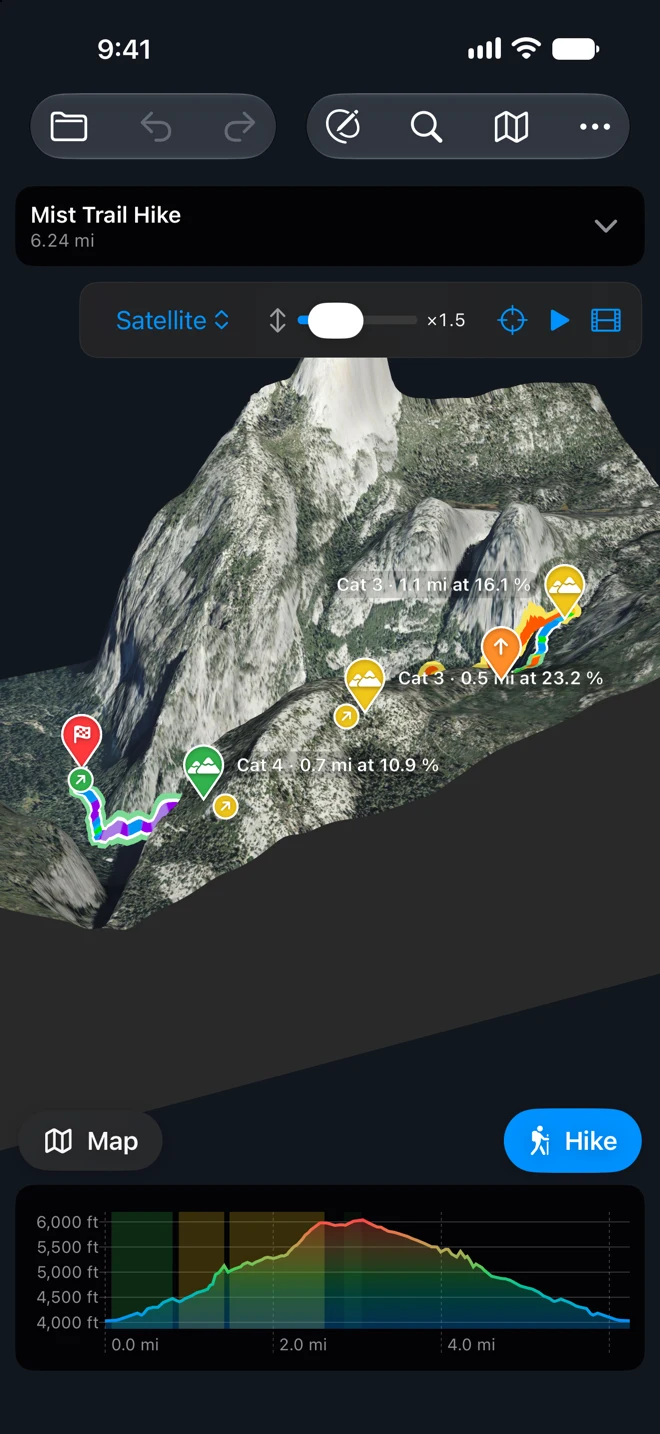
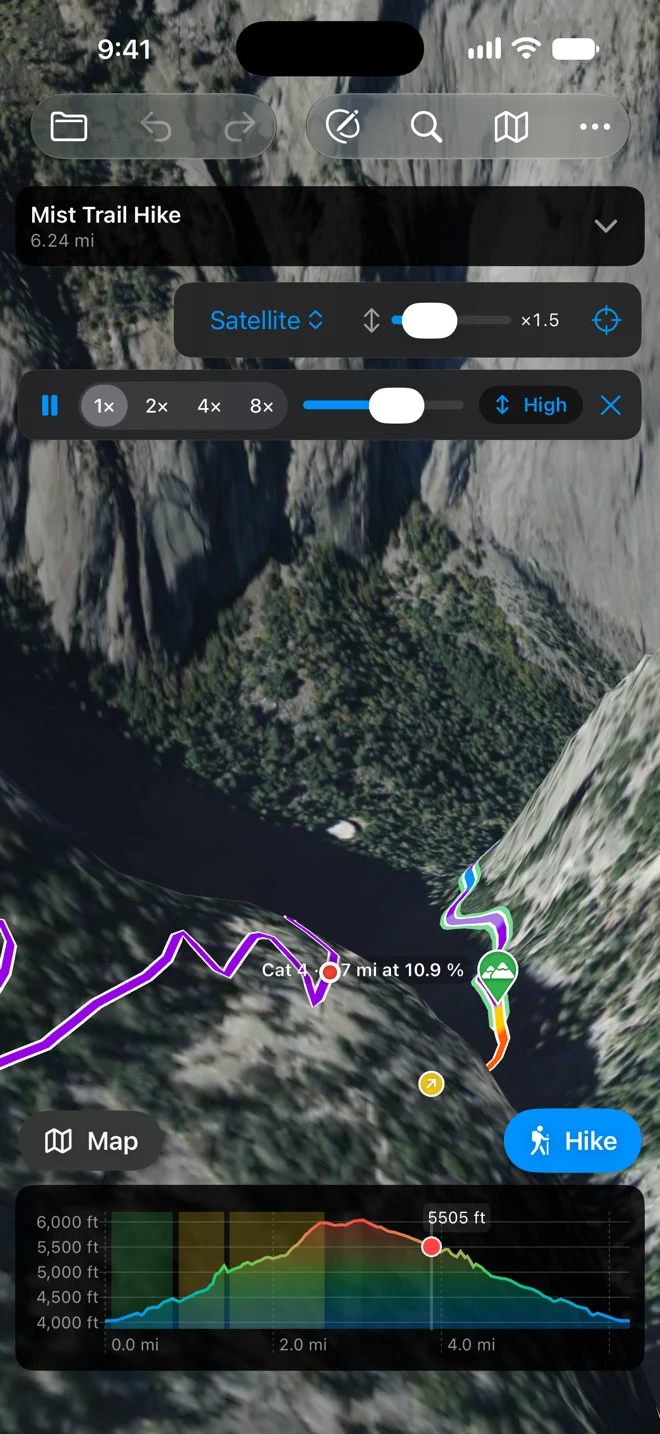
In the track’s panel, tap the name and give it one with “hike” or “trail” in it, like “Mist Trail Hike”. The button above the chart then says Hike; an unnamed track shows the activity you used last. Tap Done to stop drawing. The route card comes back, and so do the 3D and Hike buttons. Open the route card to see the climbs, each with its length, its average grade, its steepest part and where it starts. The steep ones get a category, as on a cycling climb. Tap 3D for the hike on the ground in 3D with the climbs marked. Then tap Fly the Route (the play button) and the camera flies along the trail. Pick the speed and the height above the line in the bar. See The ground in 3D.
Set up the hike
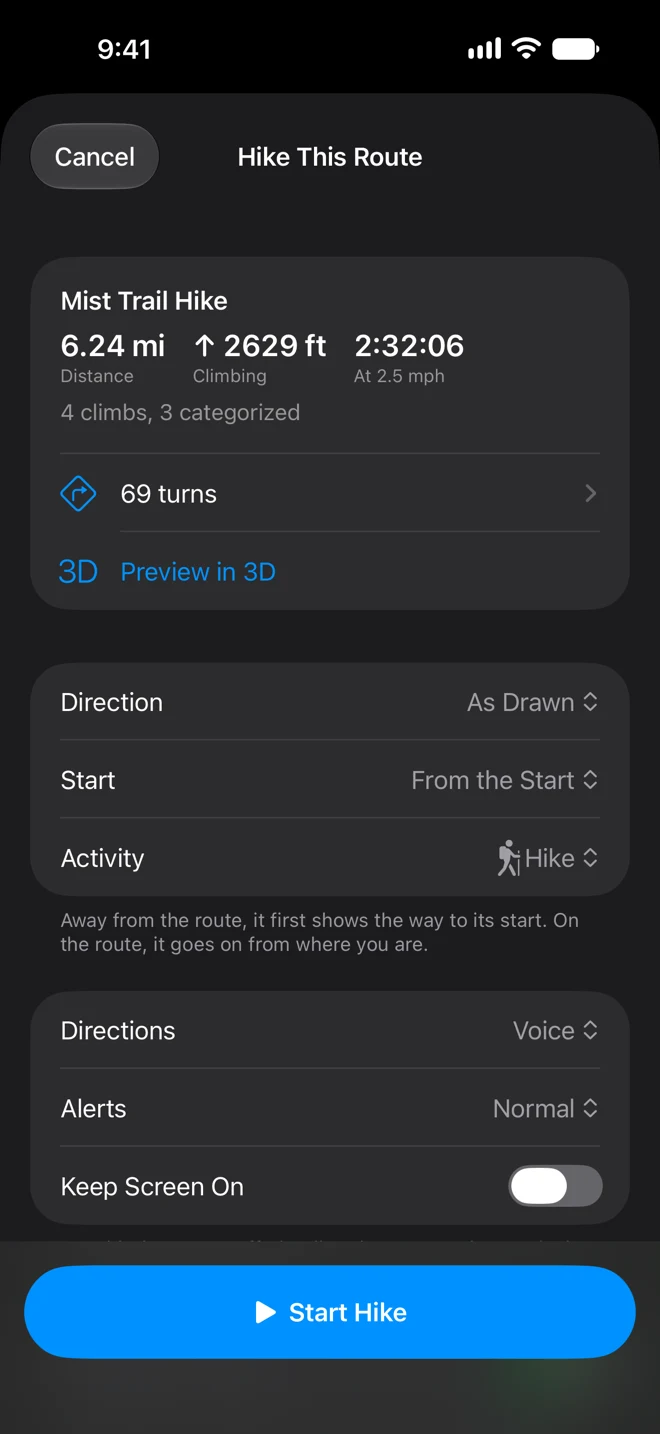
Tap Hike above the chart. The Hike This Route sheet shows the distance, the climbing, the time at a hiking pace, the climbs and the number of turns.
- Activity: Hike. The buttons say Hike, the arrival time uses a hiking pace, and you count as off the route at 35 meters instead of a bike’s 50.
- Directions: Voice, so you don’t need to look.
- Keep Screen On: off. The screen is what drains a phone on a long day. With it off, the directions are still spoken, and you unlock to see the map.
- Record Your Track: on. You get the hike as you walked it, as a GPX file, when you end.
The sheet also says it plainly: your route, its turns and its climbs are on the iPhone and work without signal, and the map loads as you go. Then tap Start Hike. (The hiking screens below were captured in the iPhone simulator following the route, not on the trail.)
On the trail
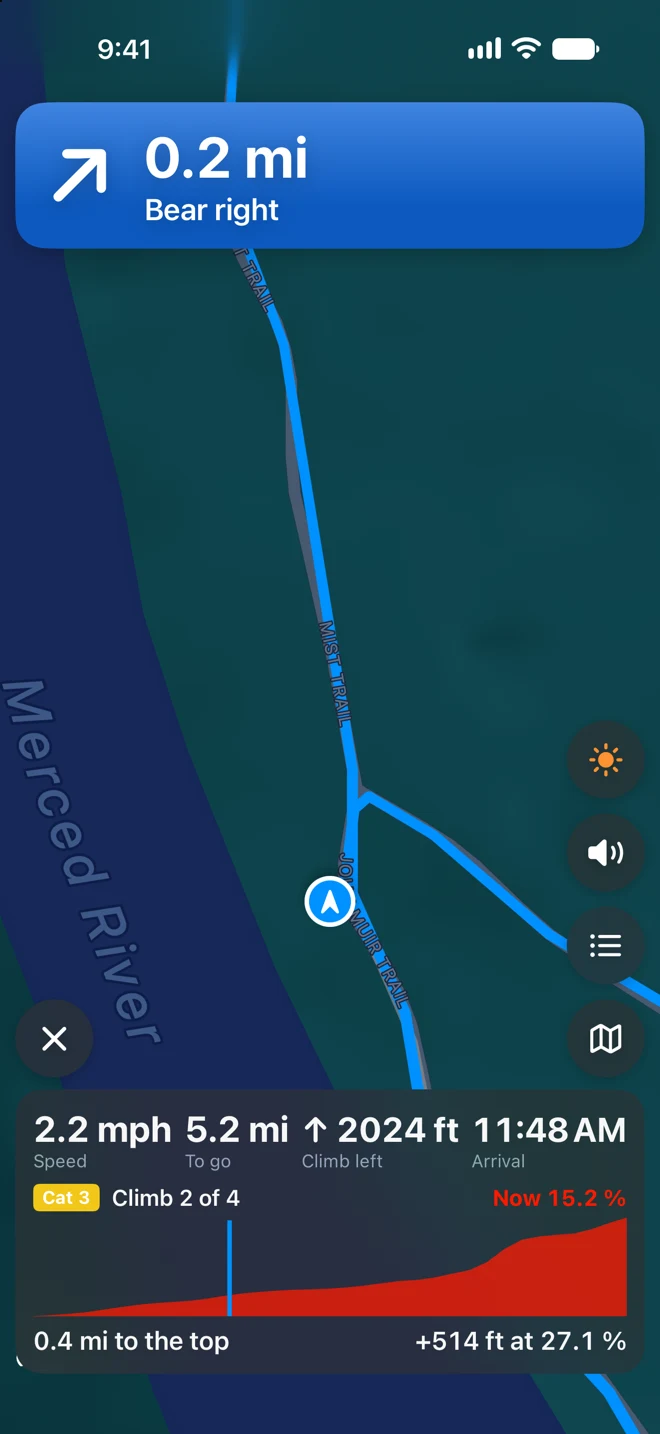
The banner shows the next junction and which way to go. On a trail the turn usually comes without a name: “Bear right.” Most junctions are spoken twice: first about 200 feet ahead, close to a minute at a hiking pace, and again about 50 feet before. Those are minimums, so at a hiking pace Alerts makes little or no difference; walking briskly, Early starts the first prompt a little sooner. A junction right after another may get only the reminder. On a climb the panel counts it down: the climb’s category and number, the grade where you are, and the distance and height to the top.
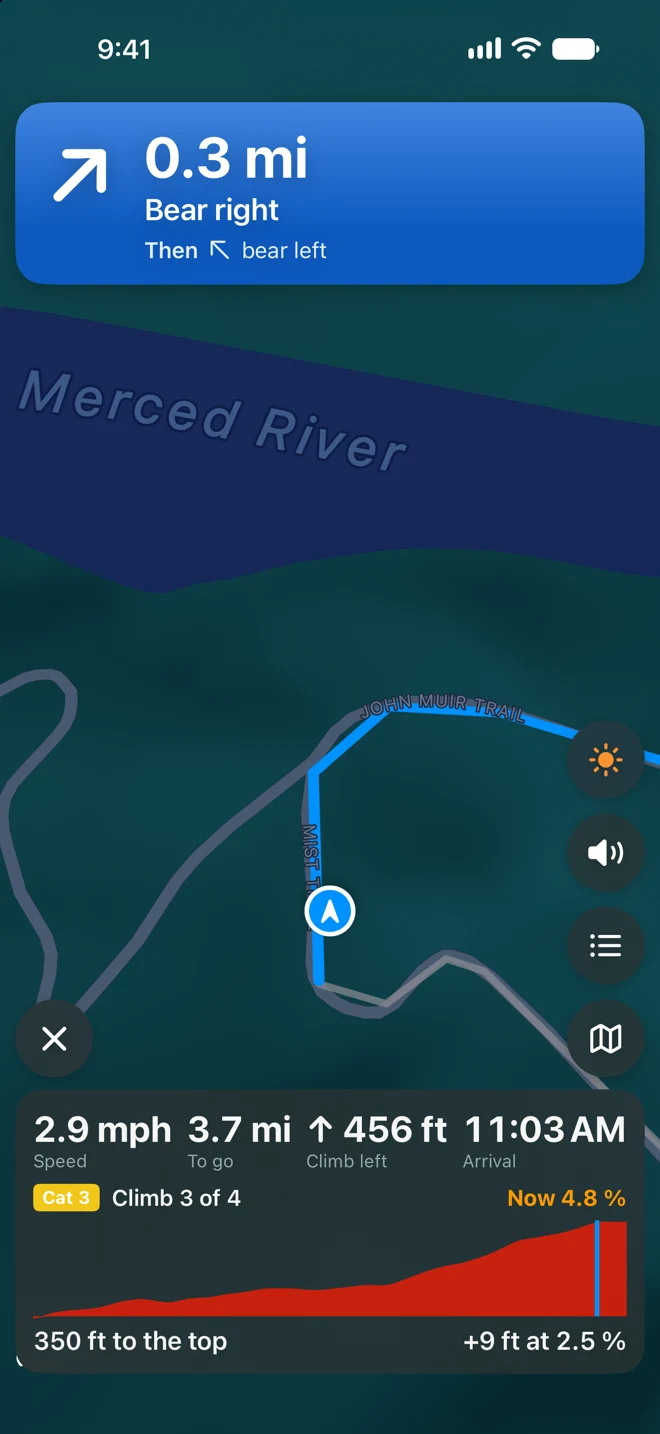
If you take the wrong fork, the phone notices once you are more than 35 meters off the route for 15 seconds. The voice says which side the route is on, and the button in the banner gives spoken walking directions back to it. Walking the route backwards, you hear “You are going the wrong way along the route.” Back on it, you hear “Back on route.”
With the iPhone locked, the next turn is on the Lock Screen (iOS 18 and later). A turn, going off the route and arriving reach your Apple Watch, so a glance at your wrist is enough.
At the trailhead you hear “You have arrived.” Tap × and then End Hike. The summary shows the hike you walked over the route you drew, with moving time, distance, gain and average pace. Save to Apple Health keeps it as a workout with its map. The details are in Ride a route, turn by turn, which covers hikes, runs and walks too.
Without a route
To record a hike without planning one, tap Record a Track on the start screen. It is free and keeps the hike as a GPX file you can add to Apple Health. Recording starts at once in the activity you used last, Walk the first time: tap the activity button at the top right of the recording screen and choose Hike, and the next hike starts as one. See Record a track.