Plan a bike ride on a national park bike path and follow it turn by turn
The best park rides are often on a path built for bikes, a few yards from the road. A route planner that only knows roads puts you on the highway beside it. In GPX Explore on iPhone you draw the ride with Follow Roads (Cycling) and Apple Maps’ cycling directions keep the line on the bike path where there is one. Then you ride it with the turns spoken, the climbs counted down and the phone on the bars or in a pocket.
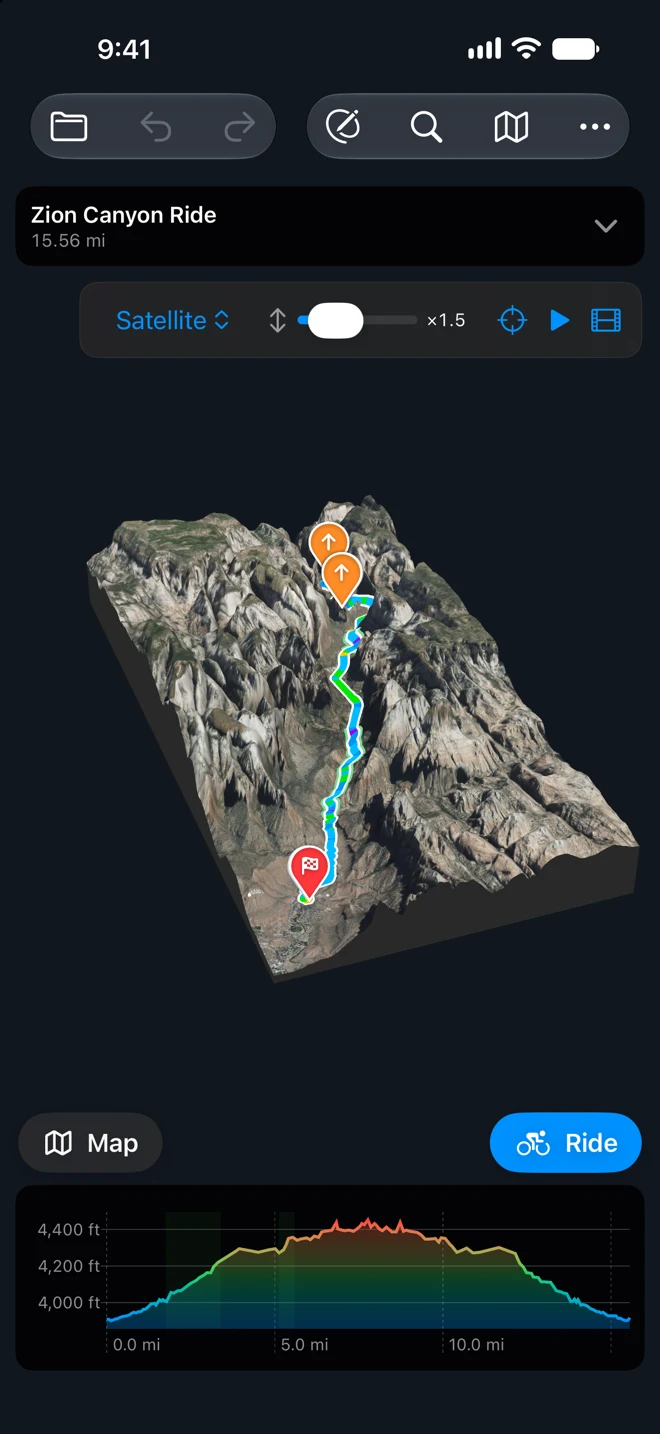
The example is Zion National Park. The ride starts at the Zion Canyon Visitor Center, follows the Pa’rus Trail along the Virgin River to Canyon Junction, and goes up the Zion Canyon Scenic Drive to the Temple of Sinawava and back: 15.6 miles. Check the park’s rules for riding the Scenic Drive before you go.
Drawing a route, the 3D view and riding turn by turn need GPX Explore Pro. Recording a ride without a route is in the free app.
Draw it: three taps, and the bike path by itself
- On the start screen, tap Draw a New Track.
- In the bar at the top of the map, tap the button for how lines are drawn and choose Follow Roads (Cycling).
- Tap where you start, then where you turn around. For an out-and-back, tap the start again, or wait until Finding a route… is gone, tap × on the point’s panel to get back to the track’s panel, and choose Track Tools ▸ Out and Back to add the way home.
Here that is three taps: the Visitor Center, the Temple of Sinawava, the Visitor Center. Each tap asks Apple Maps for cycling directions from the last point. The first two miles land on the Pa’rus Trail, the paved path along the river, not on the road beside it. Above Canyon Junction the route follows the Scenic Drive.
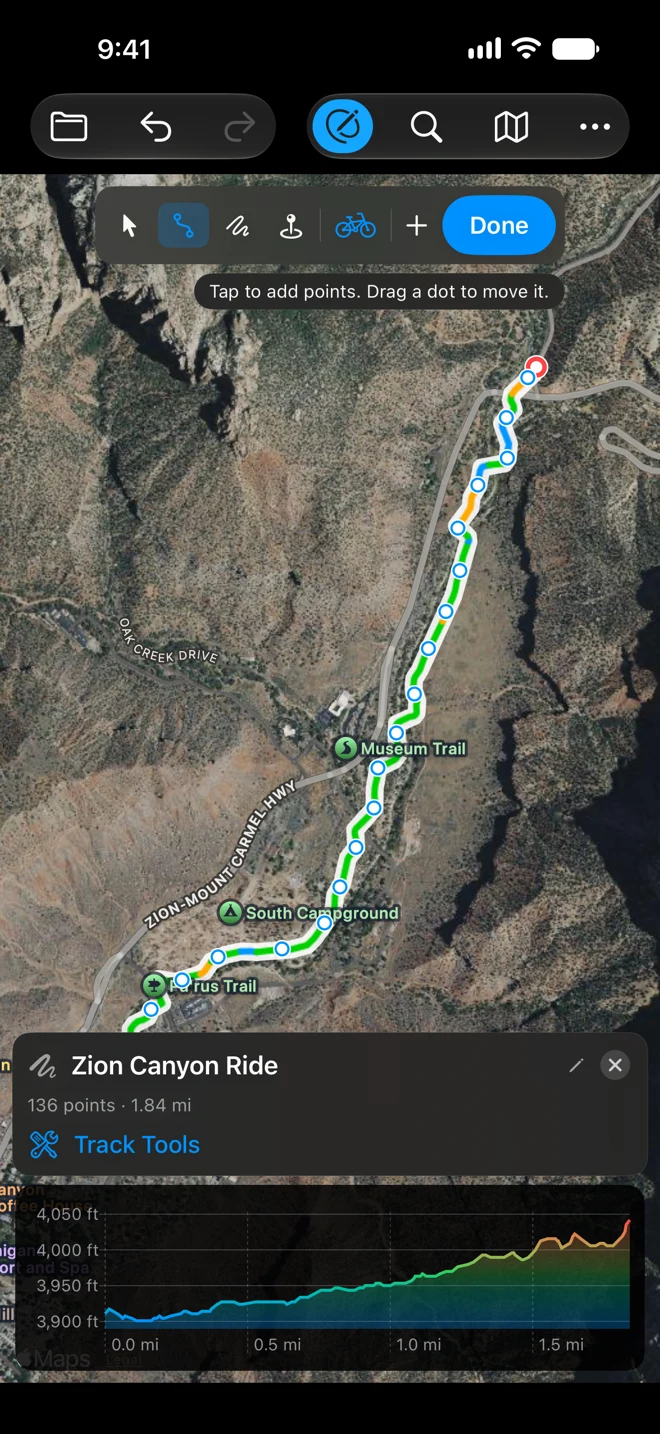
If a stretch goes somewhere you don’t want, choose the arrow (Select and Move) and drag one of your points. The route is found again through the new place, along the roads and paths. Every point gets its height from our terrain model as you draw, so the elevation chart is there before you ride. See Follow paths and roads.
Look at the climbs and the canyon first
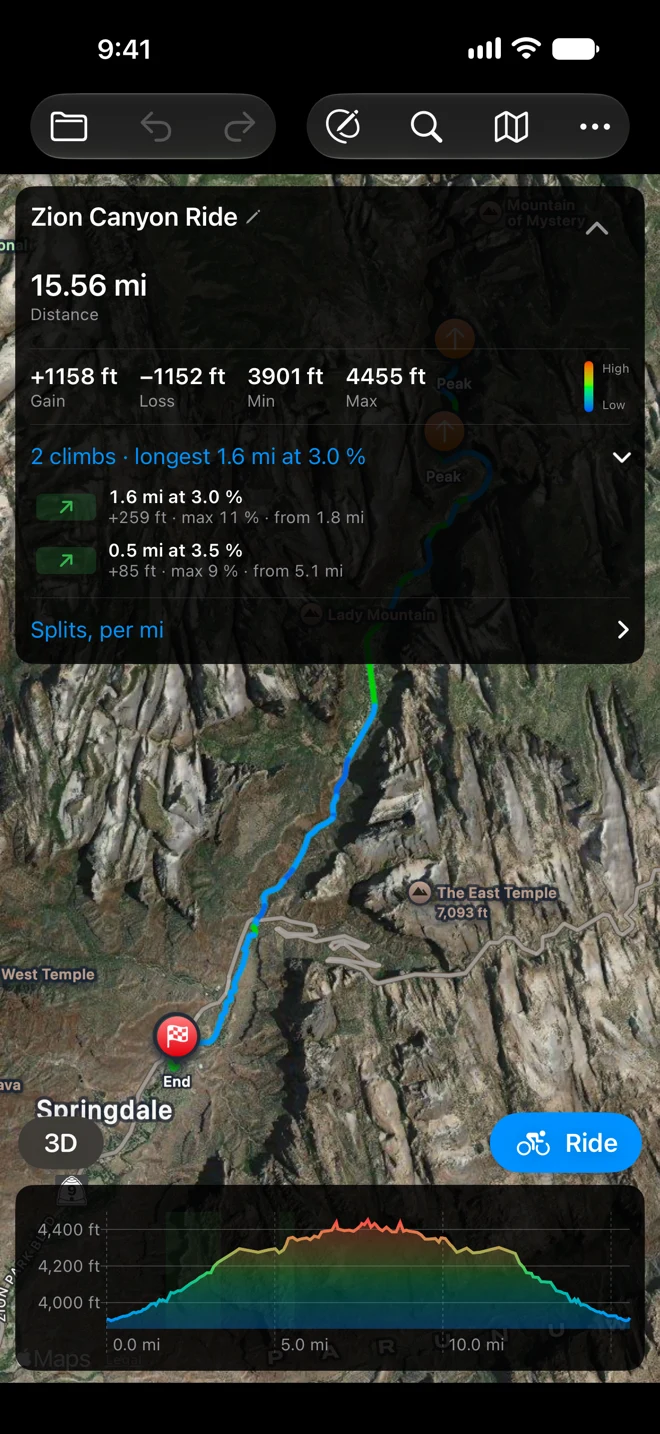
After each tap or drag, the panel under the map shows that one point. When the last leg has landed and Finding a route… is gone, tap × on it for the track’s panel. There, tap the name and give it one with “ride” or “bike” in it, like “Zion Canyon Ride”. The button above the chart then says Ride; an unnamed track shows the activity you used last. Tap Done to stop drawing. The route card comes back, and so do the 3D and Ride buttons. Tap the arrow on the route card to open it. Under the totals, the climbs are listed with their length, average grade, steepest part and where they start. This ride has two: 1.6 miles at 3 percent from mile 1.8, and half a mile at 3.5 percent from mile 5.1.
Tap 3D and the ride is drawn on the ground in 3D. A climb steep enough for a category gets a marker at its top; these two are too gentle for one. In the 3D view, Fly the Route flies along the line, and Preview in 3D in the ride sheet does the same in the direction you’ll ride. See The ground in 3D.
Ride it
Tap Ride above the chart. The Ride This Route sheet shows the distance, the climbing, the time at a riding pace, the climbs and the number of turns. Set Activity to Ride and Directions to Voice. Leave Record Your Track on. Then tap Start Ride.
The banner at the top shows the distance to the next turn and the turn. When two turns come close together it shows Then with the second one. The map turns with you. Below it are your speed, the distance to go, the climbing left and the arrival time.
On a climb the panel turns into the climb: its number (“Climb 1 of 2”), the grade where you are, and the distance and height to the top.
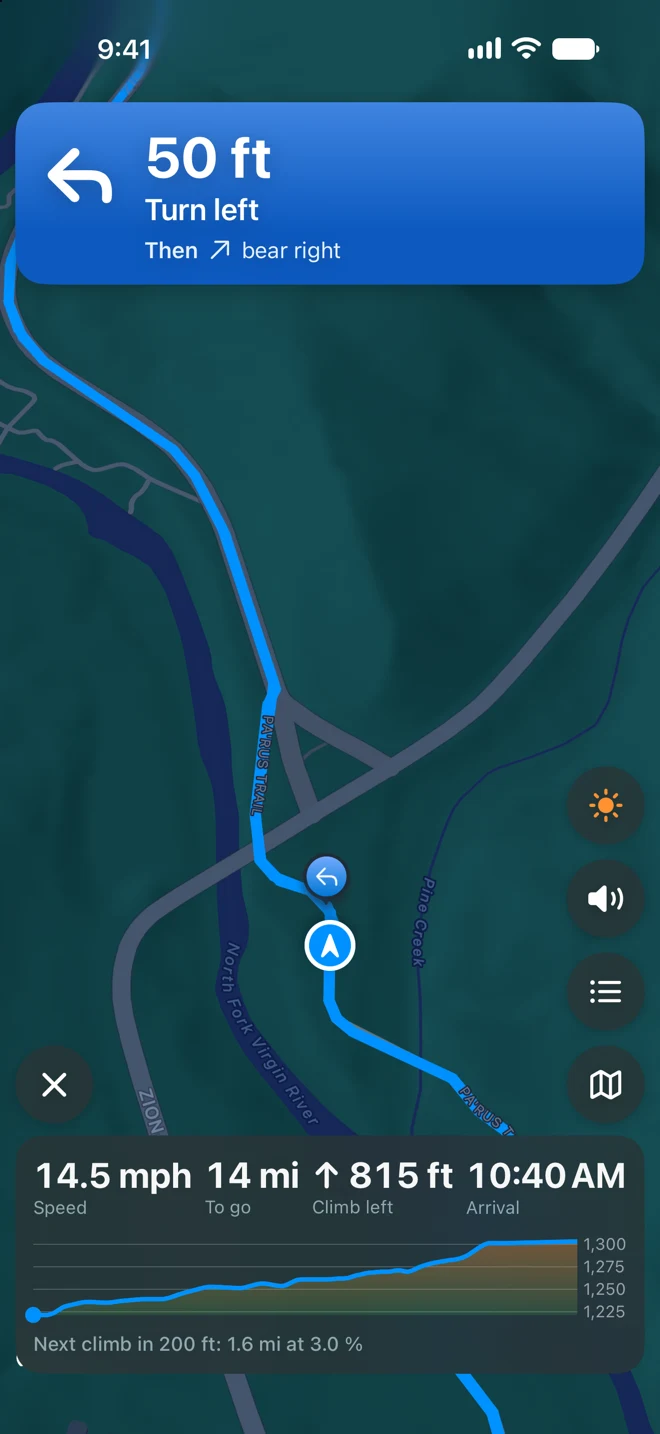
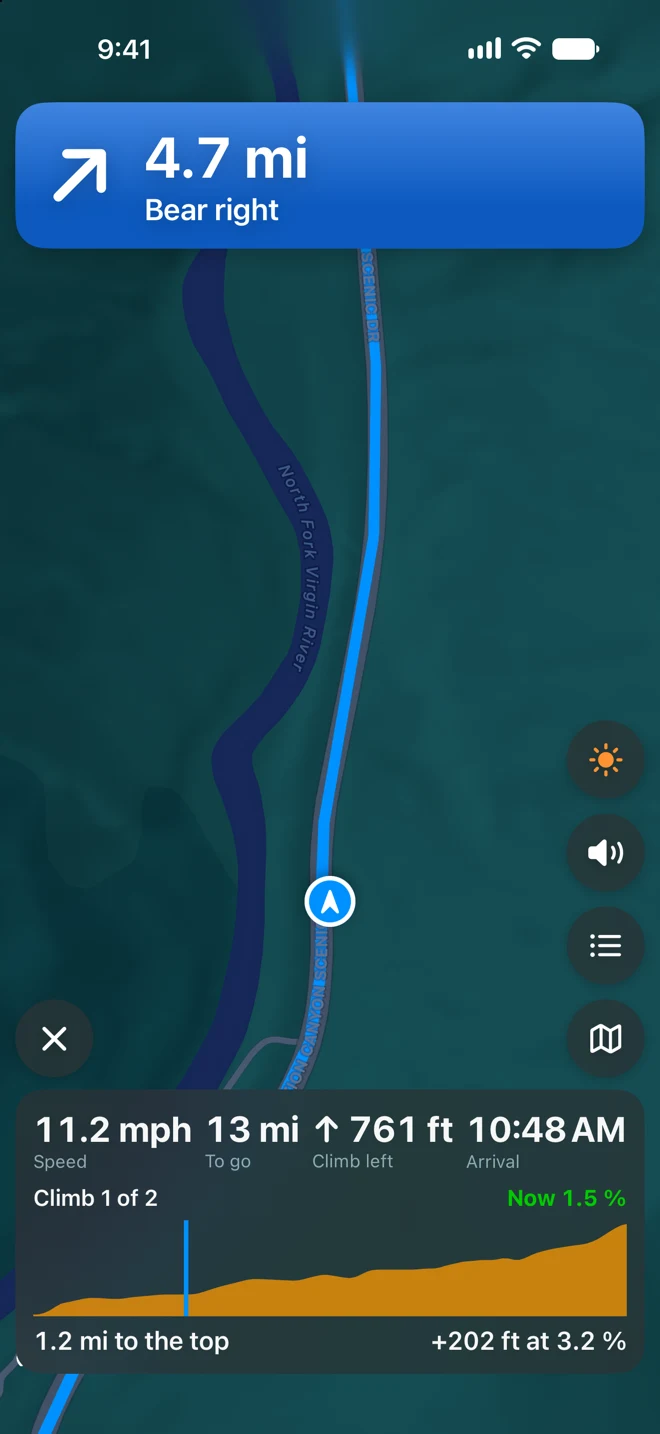
Both riding screens were captured in the iPhone simulator following the route, not on a ride.
What you hear
Most turns are spoken twice, with the street name when Apple Maps has one: a first prompt ahead of the turn, then a short reminder just before it. How far ahead depends on your speed: the first prompt aims for about 20 seconds out but usually comes no closer than about 200 feet, and the reminder a few seconds or about 50 feet before. At riding speed the 20 seconds is what counts, so Alerts moves them, Early sooner and Late later; riding slowly, the minimums take over. Slower than about 5 mph, as on a steep climb, the first prompt is left out and you hear only the reminder. Two turns close together are said as one. A long stretch with no turns starts with “Continue for 4 miles”. Music gets quieter while it speaks, and a podcast pauses.
Off the route
On a bike, once you are more than 50 meters off the route for 10 seconds, the banner turns red and the voice tells you which side the route is on. The button in the banner gives spoken directions back to the route from Apple Maps: cycling directions on iOS 26 and later, walking directions before that. When you are back on it you hear “Back on route”, and if you rejoined more than 200 meters further along, how much you skipped.
The phone on the bars, or in a pocket
- On a mount, turn Keep Screen On on in the sheet, or tap the sun on the riding screen during the ride.
- In a pocket or a bag, leave it off. The directions keep coming with the screen locked. On iOS 18 and later the next turn is on the Lock Screen and in the Dynamic Island. With the iPhone locked, a turn, going off the route and arriving reach your Apple Watch.
- Battery. The screen uses the most battery. On a long ride, keep it off on the long straight stretches and switch it on with the sun before a busy section.
The end of the ride
Tap × and then End Ride. The summary shows your ride drawn over the route, with moving time, distance, gain and average speed. Save to Apple Health adds it as a workout with its map, and the GPX file is in the Rides folder of GPX Explore’s folder in Files.
All of it, from the settings to the Lock Screen, is in Ride a route, turn by turn.
Without a route
To record a ride without planning one, tap Record a Track on the start screen. It is free and saves a GPX file you can add to Apple Health. Recording starts at once in the activity you used last, Walk the first time: tap the activity button at the top right of the recording screen and choose Ride, and the next ride starts as one. See Record a track.