GPX Explore 2.2.3: the road ahead
A rider in Kuala Lumpur uses GPX Explore on his handlebars, and at the end of October he wrote in. The riding map showed him too small a piece of the route. He wanted to see 500 to 1,000 meters of it ahead of him. He could pinch the map out to look, but then it stopped following him until he tapped back into the riding view.
He was right. I measured what the riding map showed at city cycling speeds: about 80 meters of road between the rider and the turn banner. The rider sat in the middle of the screen, so the bottom half of the map was road already ridden. It was meant to show about a minute of road ahead, and at those speeds it showed about a quarter of that.
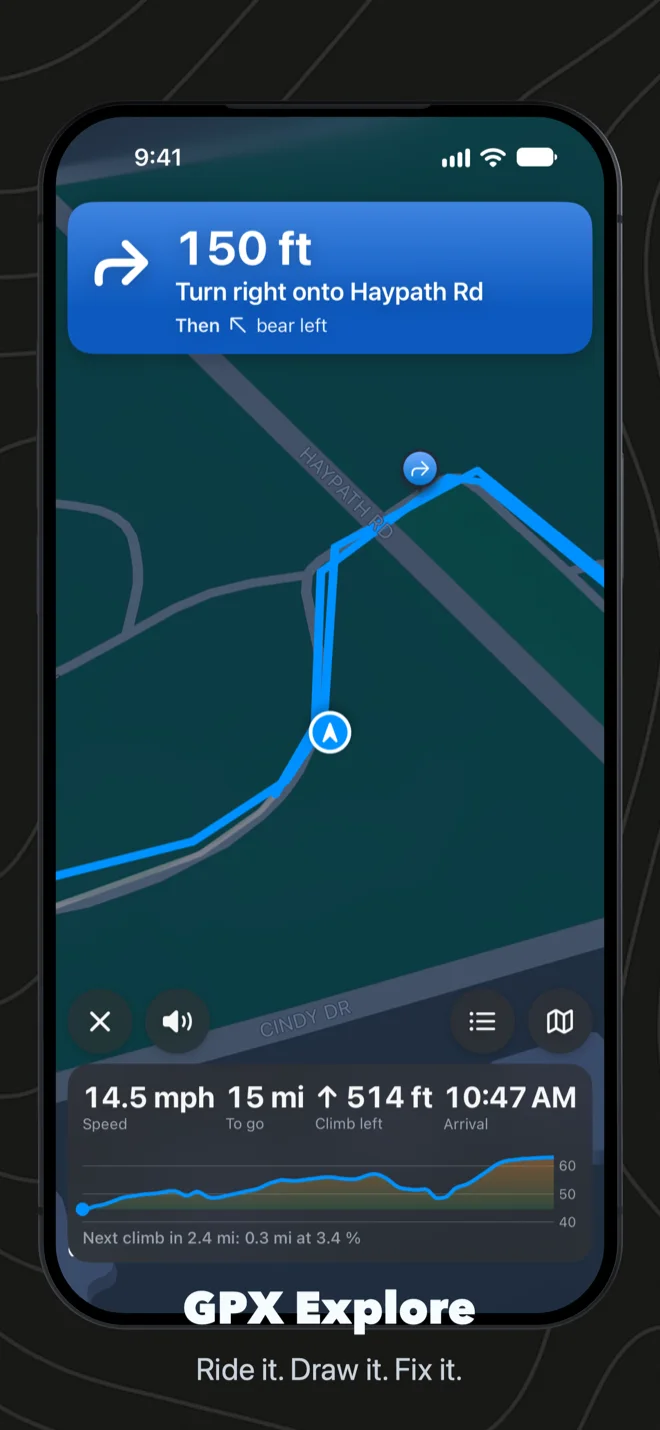
A pinch sets the zoom
In 2.2.3, a pinch sets the riding map’s zoom and the map keeps following you. One pinch out gets you the 500 to 1,000 meters he asked for. GPX Explore remembers the zoom for your next ride, and keeps one for each activity, so a ride and a walk each have their own. Pinch back in for the default. Dragging the map with one finger still lets you look around, and Recenter brings you back.
The default changed too. You now sit low on the screen, about three quarters of the way down from the turn banner to the panel, so most of the map is road ahead of you. That road is about a minute of riding at your pace: at 18 km/h (11 mph), about 300 meters. The camera follows a cruise speed rather than each second’s speed. It catches up within about 20 seconds when you ride faster and comes down over a couple of minutes when you slow, so the map does not zoom in and out with every change of speed.
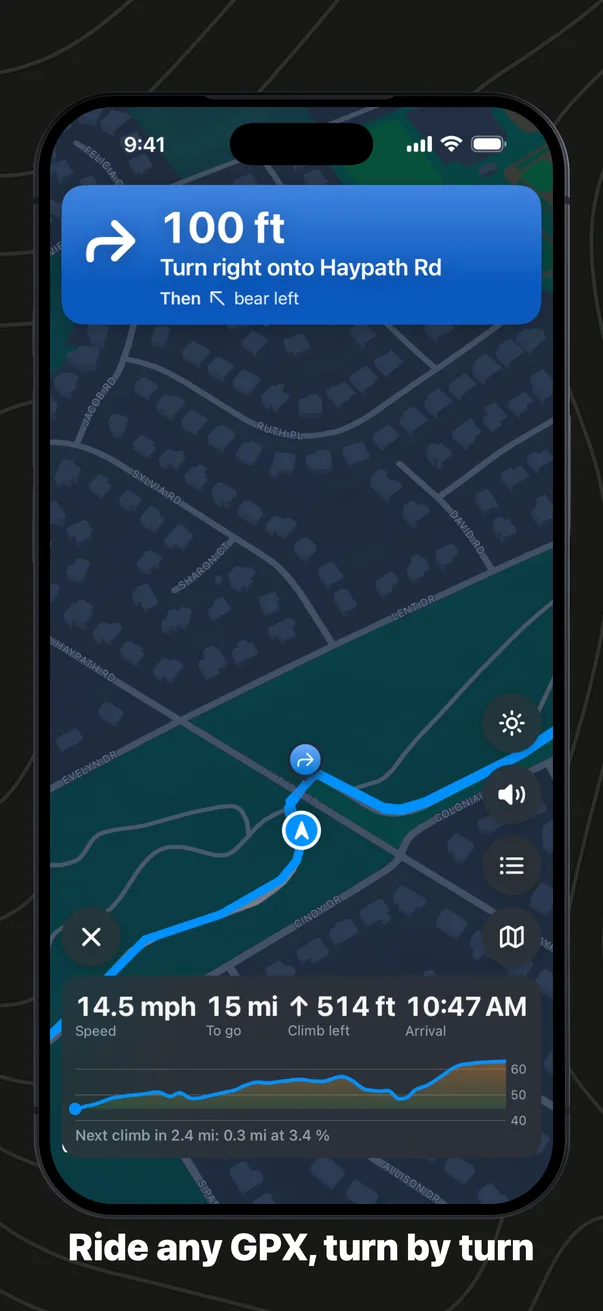
Steady at lights and stops
Then I drove it myself: phone in a car mount, zoom pinched out, a planned route, and the screen recording. On the open road it held. Stopped at a light, the map jumped far out and back in every couple of seconds. Stopped just short of a turn, it sat close in and turned a few degrees at a time. The map had been sizing itself from the speed of each moment, which drops to zero at every light, and it closed in before every turn, which is where the lights and stop signs are.
Now the zoom follows the pace of the ride and holds still while you are stopped. It no longer closes in for turns; the banner and the turn’s marker on the map carry the turn, and the zoom stays the one you chose. While you wait at a light, the map keeps the direction you were going instead of turning with the compass, which a handlebar or car mount throws off.
Keep Screen On, while you ride
On that drive the screen went dark when I wanted to look at it. Keep Screen On was a switch in the sheet before the ride and in Settings, and nowhere once the ride had started. Now it is a button on the riding screen, a sun that turns orange while it is on, with a short note that says which way it went: Screen stays on, or Screen locks as usual. It lasts for that ride; the default in Settings stays as you set it.
The buttons stand at the side
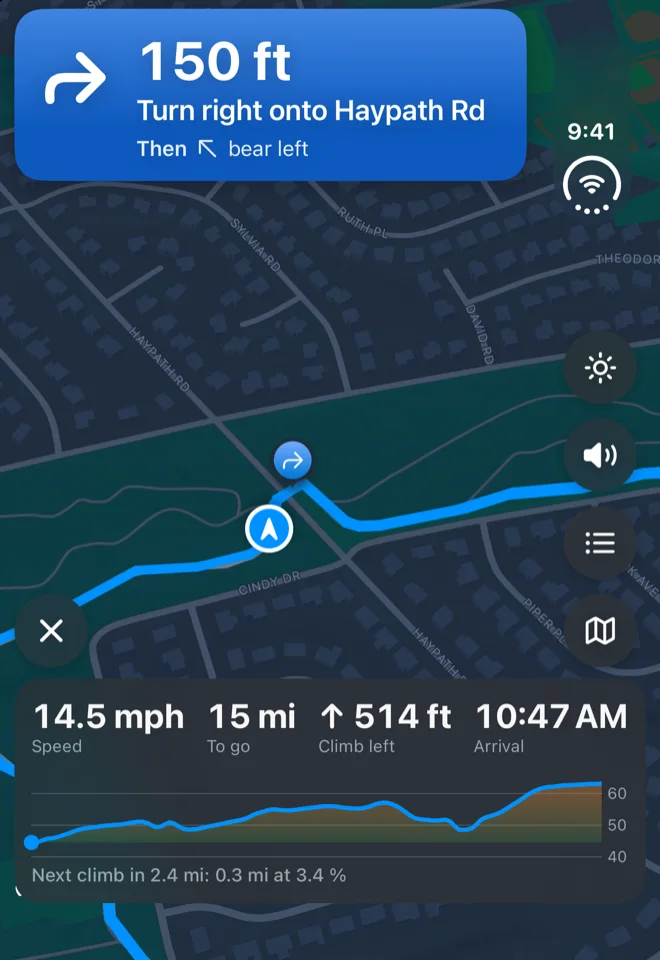
Keep Screen On, Mute, Turns and Overview now stand in a column at the side of the map, with the × that ends the ride alone in the other corner, so the map reaches down to the panel. Overview, the one you press most, is lowest, nearest your thumb. On iPhone Duo the column sits in the strip down the side of the screen, and the panel spreads out under it. An iPhone on its side keeps the buttons in a row.
Italian and Traditional Chinese
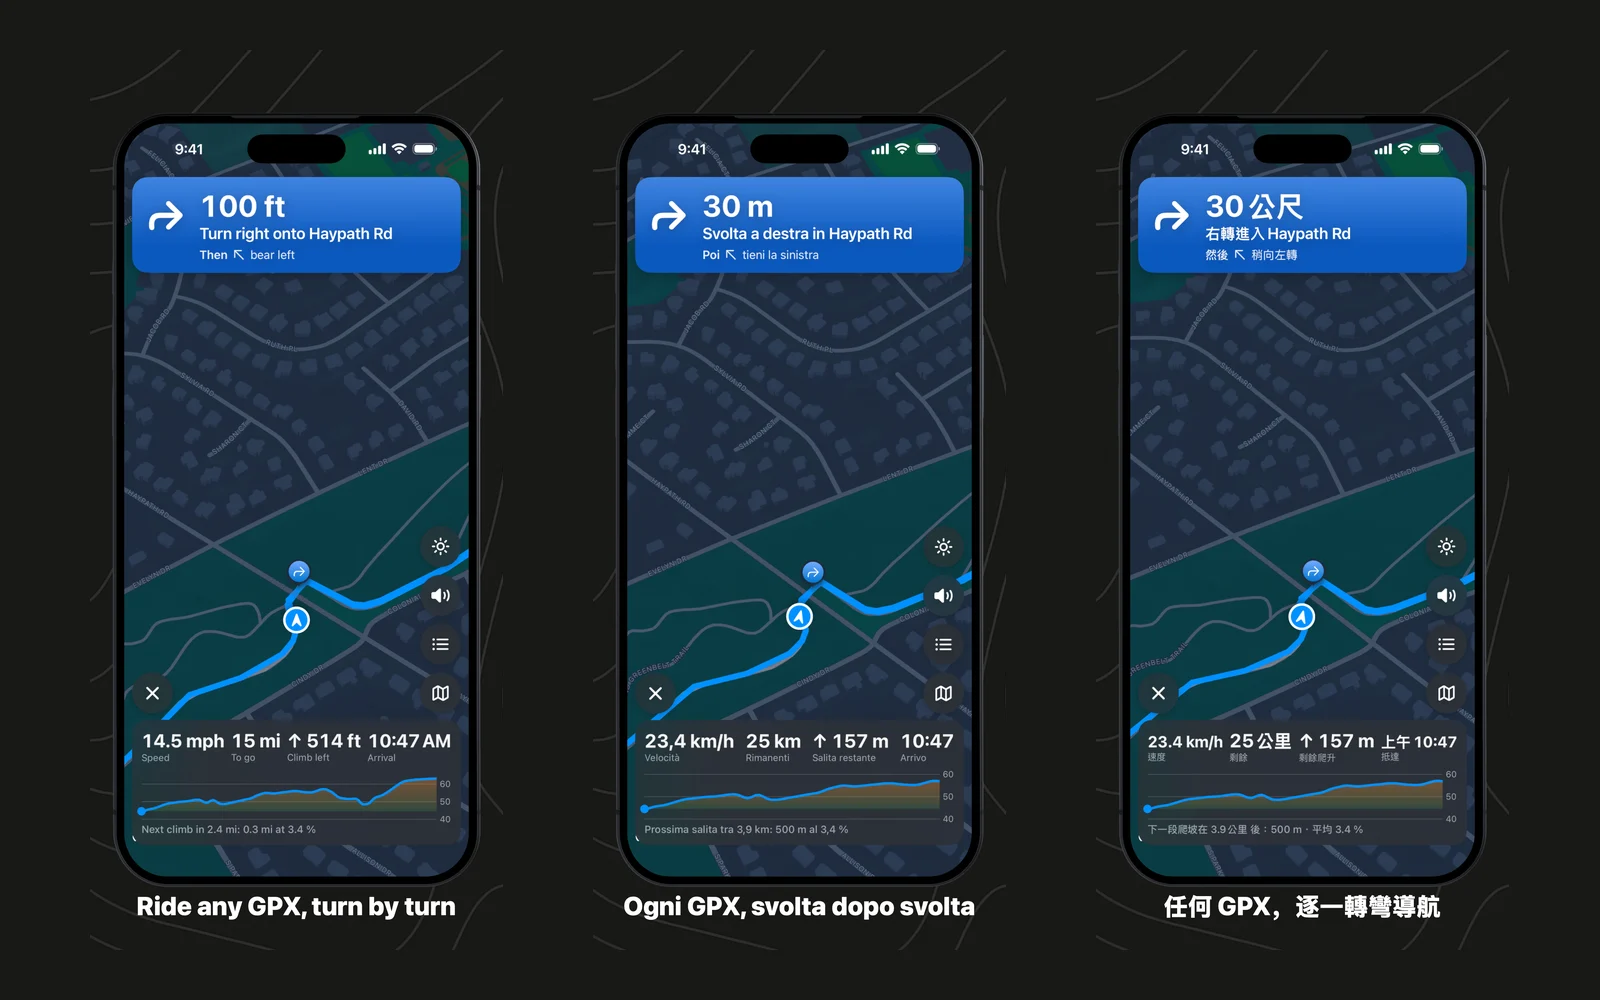
GPX Explore now speaks Italian and Traditional Chinese, so it comes in seven languages: English, German, French, Spanish, Japanese, Italian and Traditional Chinese. On the Mac App Store it sits near the top of the Navigation chart in Italy and in Taiwan, and until now people there read it in English. Every screen is translated, the spoken turns too. The Chinese is written for Taiwan, with the words riders and hikers there use: 軌跡 for a track, 航點 for a waypoint, 累計爬升 for the climbing. The GPX Explore page is in both languages as well: in Italian and in Traditional Chinese.
Easier to read in light mode
In light mode the elevation chart and the route info card let some of the map show through, and over a busy map in sunlight that made them harder to read. They are nearly solid now. A new switch in Settings, under Map, Solid Chart and Route Info, makes them fully opaque and hides the map behind them.
What it costs
Riding turn by turn is part of GPX Explore Pro, a one-time purchase in the app that covers the iPhone, iPad and Mac; the riding screen itself is on iPhone and iPad. Viewing any GPX file, the climbs, printing a cue sheet and recording a track are free. The GPX Explore page shows the whole app, and the guide has a page on riding a route, new buttons included.
This version started with one email. If something gets in your way on a ride, write to [email protected].