Training Your Own ChatGPT on DGX Spark: Getting nanochat to Work with CUDA 13.0
The $100 ChatGPT Challenge
When Andrej Karpathy released nanochat with the tagline “The best ChatGPT that $100 can buy,” I knew I had to try it. The promise is compelling: train your own ChatGPT-like model from scratch - including tokenization, pretraining, finetuning, evaluation, and web serving - all in a clean, hackable codebase under 8,500 lines of code.
I have an NVIDIA DGX Spark workstation with an NVIDIA GB10 GPU running Ubuntu 24.04 and CUDA 13.0. Naturally, I wanted to see if I could get nanochat running locally. Spoiler alert: it worked, and after 261 hours of training, I have a working ChatGPT-like model!
The Hardware Reality Check
Here’s what I’m working with:
- GPU: NVIDIA GB10 with 119.7 GB memory
- OS: Ubuntu 24.04.3 LTS
- CUDA: Version 13.0 (release V13.0.88)
- Driver: 580.95.05
- CPU: 20 cores with 119.7 GB RAM
The challenge? The upstream nanochat repository is built for CUDA 12.8, which is what most cloud GPU providers (Lambda, AWS, etc.) are running. CUDA 13.0 is newer, and while you’d think “newer is better,” in the deep learning world, bleeding edge often means broken dependencies.
What is nanochat?
Before diving into the fixes, let me explain why nanochat is special. Unlike massive frameworks like Transformers or megarepos with thousands of configuration options, nanochat is designed to be:
- Complete: Covers the entire pipeline from raw text to a chatbot you can talk to
- Minimal: ~8,500 lines across 44 files - you can actually read and understand it all
- Hackable: Clean code with no configuration monsters or factory pattern hell
- Educational: Perfect for understanding how modern LLMs actually work
The speedrun.sh script trains a competent 1.9 billion parameter model in about 4 hours on an 8xH100 node for roughly $100. The resulting model outperforms GPT-2 (2019) while being completely yours to modify and experiment with.
The CUDA 13.0 Problem
When I first cloned the repo and tried to run bash speedrun.sh, I immediately hit dependency issues. The errors were the usual suspects:
- PyTorch built for CUDA 12.8 couldn’t find CUDA 13.0 libraries
- Triton (PyTorch’s GPU kernel compiler) was looking for the wrong CUDA toolkit
- Version mismatches between NumPy, PyTorch, and CUDA
The root cause: nanochat’s pyproject.toml pulls PyTorch from the pytorch-cu128 index, which expects CUDA 12.8.
The Fix: Four Key Changes
I had to make coordinated changes across the dependency stack. Here’s what worked:
1. Upgrade PyTorch to 2.9.0 with CUDA 13.0 Support
In pyproject.toml, I updated the PyTorch version and changed the CUDA build target:
# Updated dependencies
dependencies = [
    # ... other deps ...
    "numpy==1.26.4",      # Pin to stable version
    "torch>=2.9.0",        # Bumped from 2.8.0
    "triton>=3.5.0",       # Explicitly add Triton
    # ... other deps ...
]
Then I updated the PyTorch source indices:
# Changed from pytorch-cu128 to pytorch-cu130
[[tool.uv.index]]
name = "pytorch-cu130"
url = "https://download.pytorch.org/whl/cu130"
explicit = true

[project.optional-dependencies]
gpu = [
    "torch>=2.9.0",  # Now pulls from cu130 index
]
Why pin NumPy to 1.26.4? I found that NumPy 2.x had breaking changes that caused subtle issues with PyTorch tensor operations. Pinning to 1.26.4 eliminated those headaches.
Why explicitly add Triton? Triton is PyTorch’s JIT compiler for GPU kernels. It needs to match your CUDA version, and making it explicit prevents version conflicts.
2. Point Everything at CUDA 13.0
In speedrun.sh, I added environment variables to make sure all tools know where CUDA lives:
#!/bin/bash

# ... existing setup code ...

# Point to CUDA 13.0 installation
export CUDA_HOME=/usr/local/cuda-13.0
export PATH=/usr/local/cuda-13.0/bin:$PATH
export LD_LIBRARY_PATH=/usr/local/cuda-13.0/lib64:${LD_LIBRARY_PATH}

# Triton needs to know where the CUDA assembler lives
export TRITON_PTXAS_PATH=/usr/local/cuda-13.0/bin/ptxas

# ... rest of speedrun script ...
These variables ensure:
- PyTorch finds the correct CUDA runtime libraries
- Triton uses the right CUDA assembler (
ptxas) for compiling kernels - All CUDA utilities are in the PATH
3. Adjust for Single GPU
The upstream speedrun.sh assumes you have 8 GPUs. My DGX Spark has one GB10, so I changed:
# Number of processes/GPUs to use
NPROC_PER_NODE=1  # Changed from 8
The beauty of nanochat’s implementation is that it automatically adapts. With fewer GPUs, it does more gradient accumulation steps - essentially trading parallel processing for sequential processing. You’ll wait longer, but you’ll get the same results.
4. Regenerate the Lock File
After changing pyproject.toml, I regenerated the dependency lock file:
uv lockThis pulled in all the CUDA 13.0-compatible versions of PyTorch, its dependencies (like nvidia-cublas, nvidia-cudnn-cu13, etc.), and resolved everything correctly.
Does It Actually Work?
Yes! After these changes, I could run:
bash speedrun.shThe training kicked off successfully. Here’s what the actual training looked like on the DGX Spark:
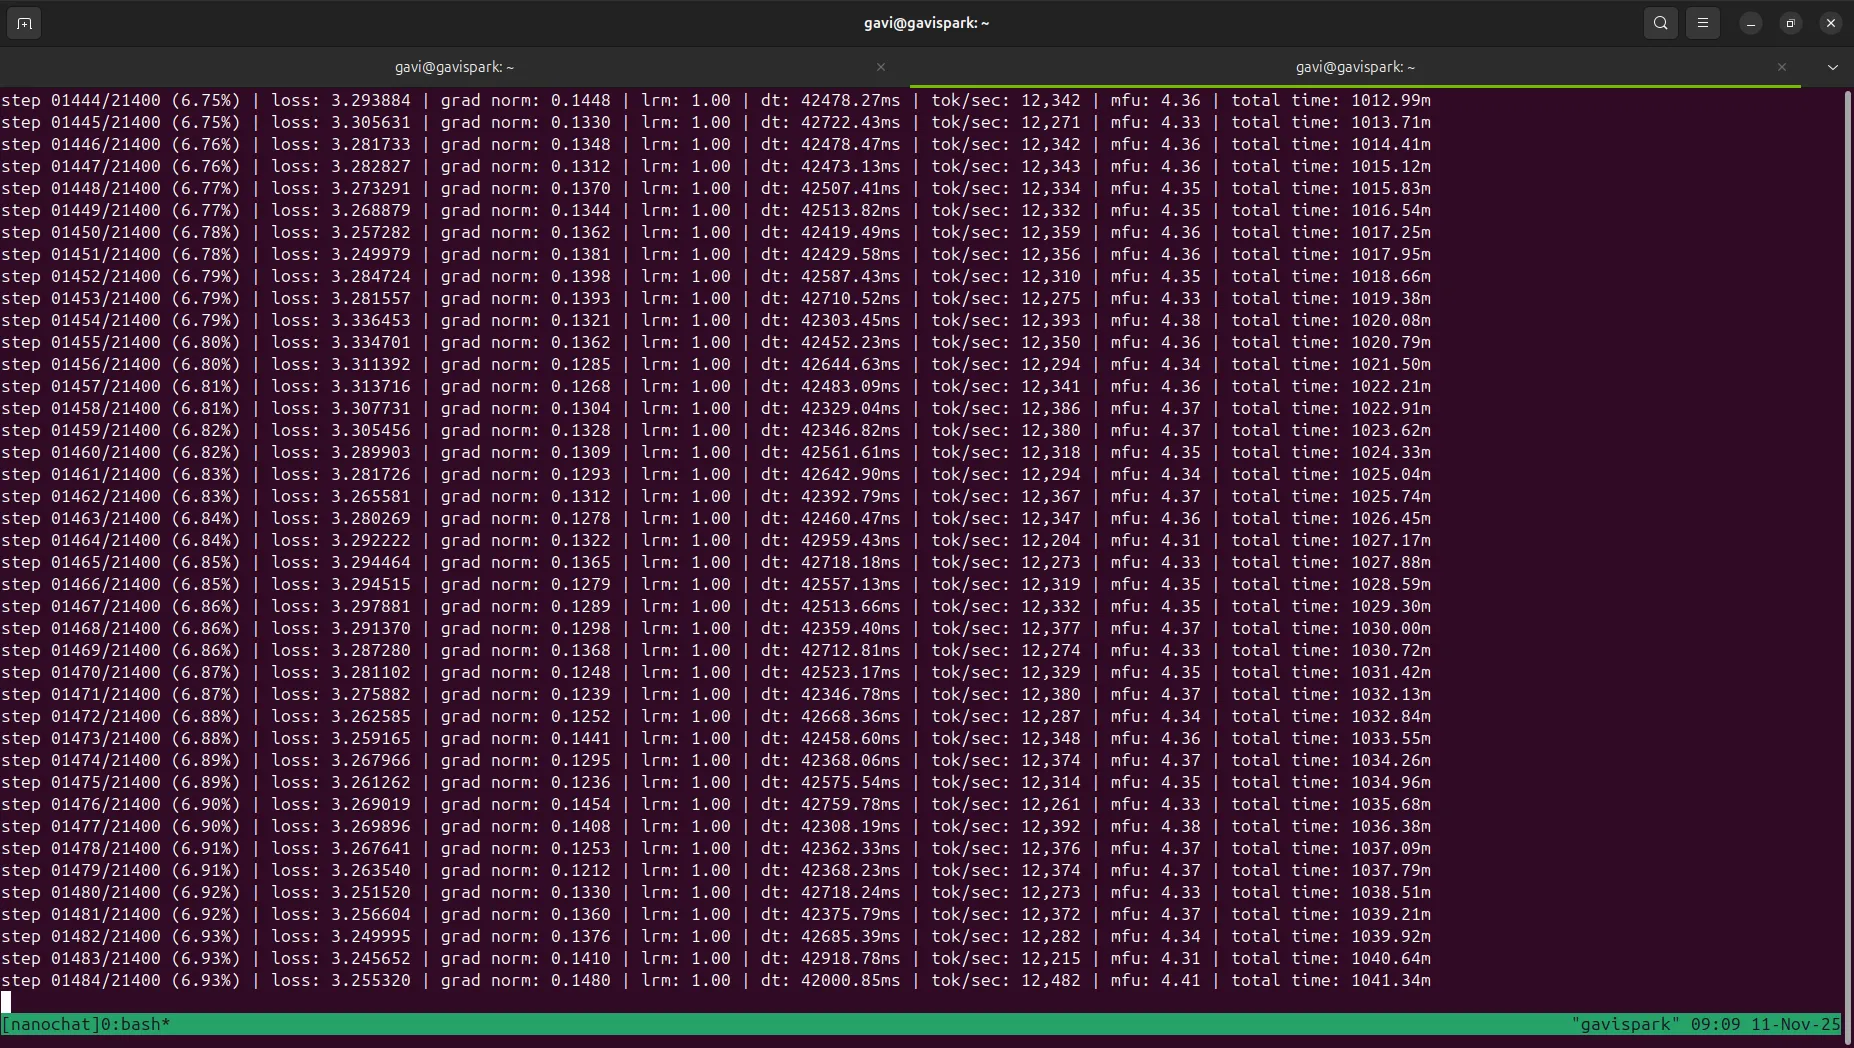
Status as of Nov 12 08:56 Eastern Time
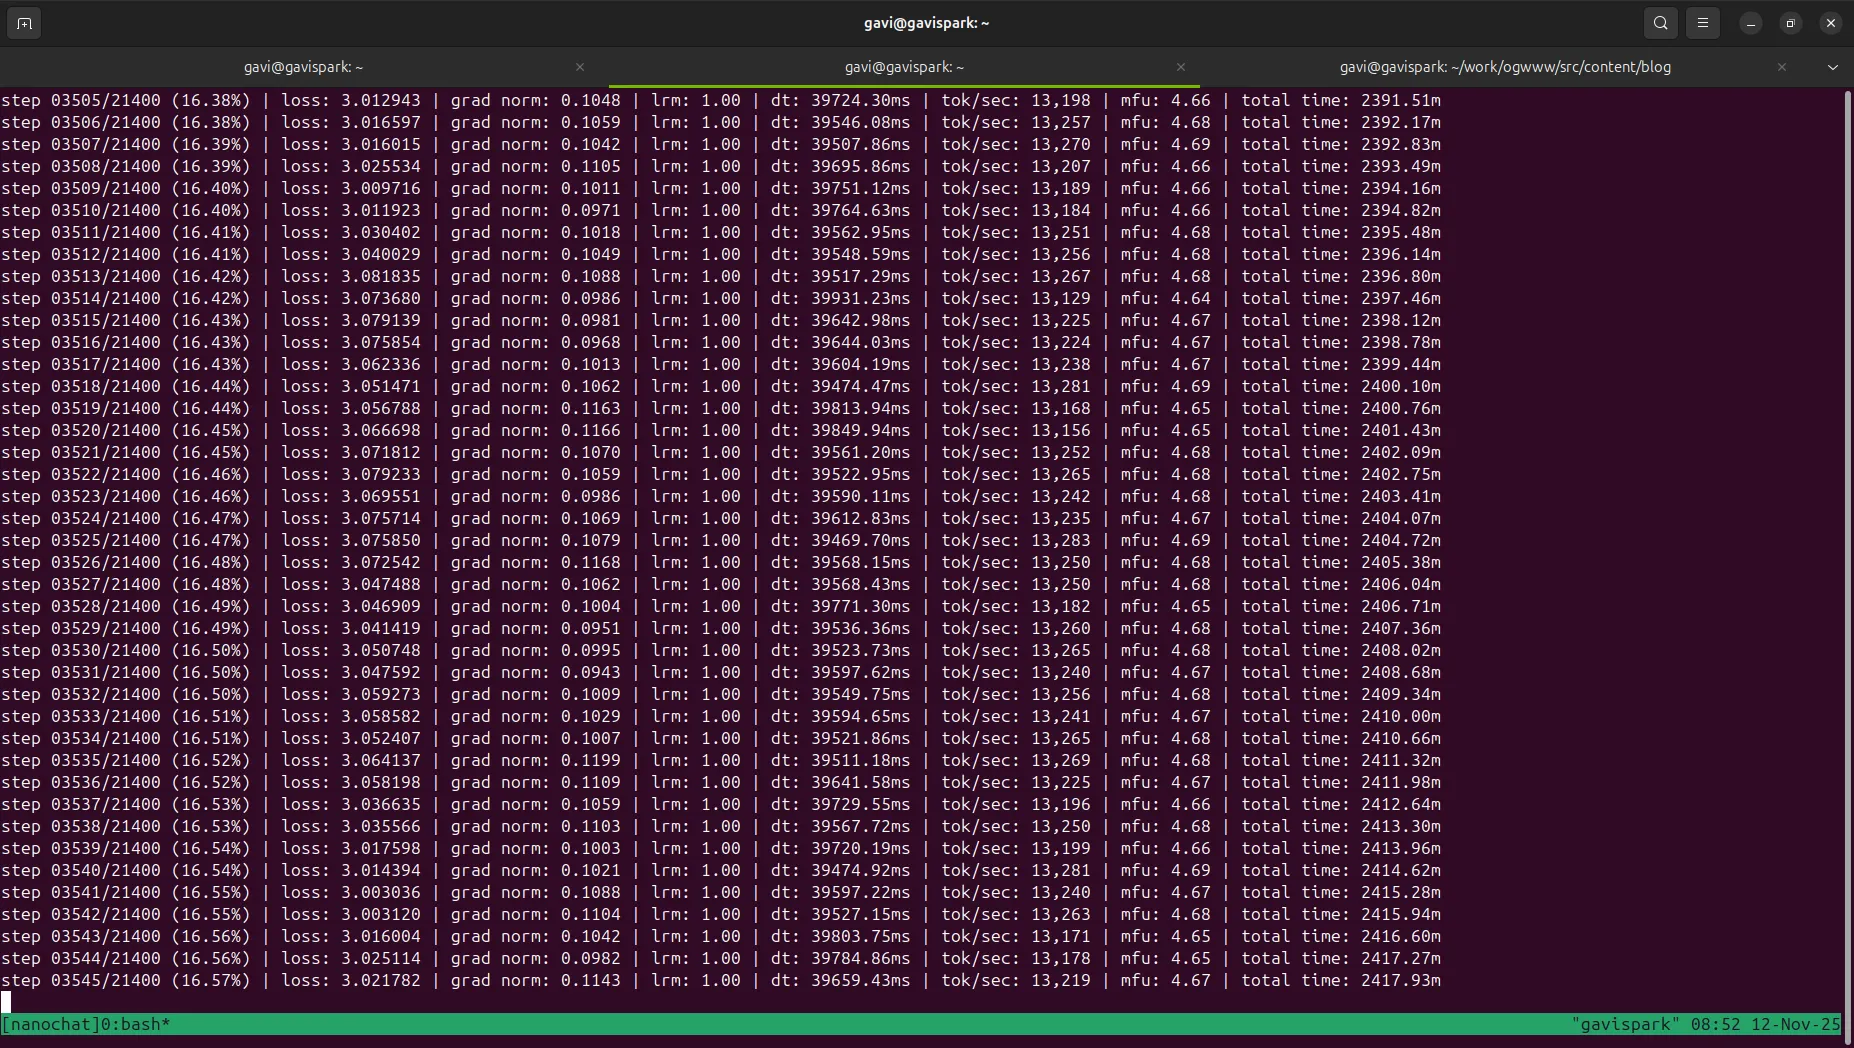
As you can see from the screenshot, the training was progressing through the iterations. The loss decreased steadily, learning rate was being adjusted, and gradient norms remained stable around 1.0 - all good signs.
Training Complete: The Results
After 261 hours (nearly 11 days) of continuous training, the full pipeline completed successfully! Here’s what the model achieved:
Model Specifications
I trained a 560 million parameter model (smaller than the default 1.9B to fit my single GPU setup better). The training consumed:
- 11.2 billion tokens during pretraining
- 3.92 × 10¹⁹ FLOPs total
- 4.35% MFU (Model FLOPs Utilization) - respectable for a single GPU
Tokenizer Performance
The custom-trained tokenizer showed solid performance compared to established tokenizers:
vs GPT-2:
- News text: +7.2% more efficient
- Code: +14.4% more efficient
- Science text: +13.5% more efficient
- Korean text: +3.2% more efficient
vs GPT-4:
- Generally within 2-10% efficiency on most tasks
- Fineweb training/validation data: within 2% of GPT-4’s efficiency
This is impressive for a tokenizer trained in under 50 seconds!
Base Model Results
After 21,400 training iterations, the base model achieved:
- Validation bits-per-byte: 0.8142
- CORE metric: 0.2201 (aggregate performance across 22 diverse tasks)
Key benchmark scores:
- HellaSwag: 0.2623
- ARC-Easy: 0.5314
- BigBench QA Wikidata: 0.5239
- PIQA: 0.3917
- LAMBADA: 0.3831
Supervised Fine-Tuning Results
After SFT on 22,439 conversation examples, the model improved across the board:
| Benchmark | Mid-training | Post-SFT | Improvement |
|---|---|---|---|
| ChatCORE | 0.2317 | 0.2482 | +7.1% |
| ARC-Easy | 0.4053 | 0.4386 | +8.2% |
| ARC-Challenge | 0.2952 | 0.3106 | +5.2% |
| MMLU | 0.3221 | 0.3292 | +2.2% |
| GSM8K | 0.0326 | 0.0591 | +81% |
| SpellingBee | 0.9883 | 0.9922 | +0.4% |
The SFT phase completed in just 701 iterations (1 epoch), showing that even a relatively small amount of high-quality instruction data can meaningfully improve a pretrained model’s capabilities.
What This Means
These results demonstrate a few important things:
-
You can train competitive models on modest hardware - A single GB10 GPU can train a functional language model, it just takes patience (11 days vs 4 hours on 8xH100s).
-
Small models can be surprisingly capable - At 560M parameters, this model is about 1/3 the size of GPT-2, yet shows reasonable performance across diverse tasks.
-
SFT provides consistent improvements - The supervised fine-tuning phase showed gains across nearly all benchmarks, particularly in reasoning tasks like GSM8K.
-
The full pipeline works - From raw text to a conversational model, every stage of nanochat executed successfully on CUDA 13.0.
Sample Output
Here are a few samples from the final model:
User: The capital of France is
Model: Paris. It is the largest city in France and the second largest city in Europe

User: The chemical symbol of gold is
Model: Au. It is a soft, malleable, ductile, and corrosion-resistant metal.

User: If yesterday was Friday, then tomorrow will be
Model: Saturday. If tomorrow is Friday, then tomorrow will be Saturday.

User: The planets of the solar system are:
Model: Mercury, Venus, Earth, Mars, Jupiter, Saturn, Uranus, Neptune,
As you can see, the model demonstrates basic factual knowledge and can complete common prompts reasonably well. It’s far from GPT-4, but it’s genuinely impressive considering it was trained from scratch in my office!
Serving the Model
Now that training is complete, I can run the model locally:
python -m scripts.chat_webAnd interact with my own tiny ChatGPT at http://localhost:8000!
The model loads quickly and responds in real-time. While it makes mistakes and has limitations, there’s something magical about chatting with a model you trained yourself with full understanding of every line of code that created it.
What I Learned
CUDA version compatibility is no joke. Every piece of the stack - PyTorch, Triton, CUDA drivers, runtime libraries - needs to align. One mismatch and nothing works.
Environment variables solve runtime mysteries. Half my debugging time was saved by properly setting CUDA_HOME, LD_LIBRARY_PATH, and TRITON_PTXAS_PATH.
Dependency pinning prevents future headaches. NumPy 1.26.4 might not be the latest, but it’s stable and works. Chasing the newest version isn’t always worth it.
nanochat is impressively robust. Despite being designed for 8 GPUs, it gracefully scaled down to my single GPU without manual gradient accumulation tuning. The training code automatically compensates for fewer GPUs.
Patience pays off in ML. 11 days of training gave me not just a working model, but deep appreciation for the compute requirements of modern AI and the engineering that goes into making it efficient.
Small models have their place. While everyone chases bigger models, a well-trained 560M parameter model can be surprisingly useful and is much easier to understand, modify, and serve.
The nanochat Experience
Training a model from scratch - even a small one - is eye-opening. You realize how much data these models need, how sensitive they are to hyperparameters, and how much compute goes into even “toy” models.
The resulting model is charming in its limitations. It hallucinates, makes silly mistakes, and sometimes gives hilariously wrong answers - like a smart kindergartener. But it’s yours. You understand every line of code that created it. You can modify the training data, tweak the architecture, or experiment with different optimization strategies.
For anyone serious about understanding modern LLMs, nanochat is an invaluable educational tool. The complete transparency - from raw bytes to conversational AI - is something you simply can’t get from using commercial APIs or even most open-source frameworks.
Code Changes Summary
If you’re running CUDA 13.0, here are the files you’ll need to modify:
pyproject.toml:
- Bump
torch>=2.9.0 - Add
triton>=3.5.0 - Pin
numpy==1.26.4 - Change PyTorch index from
pytorch-cu128topytorch-cu130
speedrun.sh:
- Add CUDA 13.0 environment variables
- Adjust
NPROC_PER_NODEfor your GPU count
Then regenerate:
uv lockYou can see all my changes in my fork: github.com/gavi/nanochat
What’s Next?
Now that the base model is trained, I’m planning to:
- Experiment with different model sizes (train smaller models for faster iteration)
- Try custom datasets for domain-specific knowledge
- Explore the reinforcement learning path for further alignment
- Use this as a foundation for specialized task-specific models
- Study the architecture modifications needed for longer context windows
The beauty of nanochat is that I now have a fully functional baseline model to experiment with. Every modification I make will teach me something about how LLMs work.
Final Thoughts
Getting nanochat running on CUDA 13.0 took a few hours of dependency wrangling, and training took 261 hours, but it was absolutely worth it. If you’re on DGX hardware or any system running CUDA 13.0, these changes should save you the debugging time.
More importantly, nanochat itself is a gem. In an era of massive, opaque AI frameworks, having a complete, understandable, hackable LLM training pipeline is refreshing. Whether you’re learning how LLMs work or want to experiment with your own models, nanochat is an excellent starting point.
The journey from “bash speedrun.sh” to a working conversational AI was educational at every step. I now understand tokenization, transformer architectures, optimization strategies, and evaluation metrics at a much deeper level than any tutorial could teach.
Now go train your own ChatGPT!
Resources:
- nanochat on GitHub - Original repository by Andrej Karpathy
- My fork with CUDA 13.0 support - All changes described above
- nanochat walkthrough - Detailed guide from Andrej
- Training report (PDF) - Complete metrics and analysis
Update Log:
- Nov 11, 2025: Initial post about getting nanochat working on CUDA 13.0
- Nov 21, 2025: Training complete! Added full results and analysis