Building a Library Management System Using Only AI (Claude 3.5 Sonnet)
I assisted in building a Library Management System for a small not-for-profit Polish school in New York, mostly using Claude Sonnet 3.5. It’s a basic CRUD (Create, Read, Update, Delete) system to manage books, copies, authors, patrons, loans, etc.
Demo
Let’s see a quick demo of the app on iOS so you can see the final product. Here are some screenshots:
SvelteKit or Next.js
When it comes to frameworks, my preference is SvelteKit, but for this project, I went with Next.js as it gave me an opportunity to learn modern React.
Here were my instructions for Claude 3.5 for the project:
This project is built with React, Supabase, and shadcn/ui.

If existing files are being modified, instead of repeating the entire code, surgically suggest the changes.
This makes Claude only give me the changes and helps me understand the code structure better while saving output tokens.
AI Starting Points
What to Name the Entities?
I knew there would be a lot of knowledge in the LLM about Library Management Systems, so I decided to use it to name the entities of the database. This was really helpful as it named them in the library sense. For example, I would have named a typical table Users, while the LLM suggested I use Patrons, as this is a library context.
Here was my starting prompt:
I am building a React app with Supabase and shadcn/ui.

This will be a project for a small library. Let's do this step by step.

I have already created an account for Supabase and have an idea about how to build the tables.

Let's start by giving me npm instructions on how to set up a simple project.

Also, give a name to this project.
AI’s Suggested Project Name
The AI suggested the project name LibTrack, which I found fitting for a library management system.
Controlling the Context
As of this writing, Claude 3.5 Sonnet has limits on how many requests you can make, even in the professional plan (based on token usage). I found the best way to keep within limits is to limit the context size by first creating a project and only uploading the files necessary for the current question.
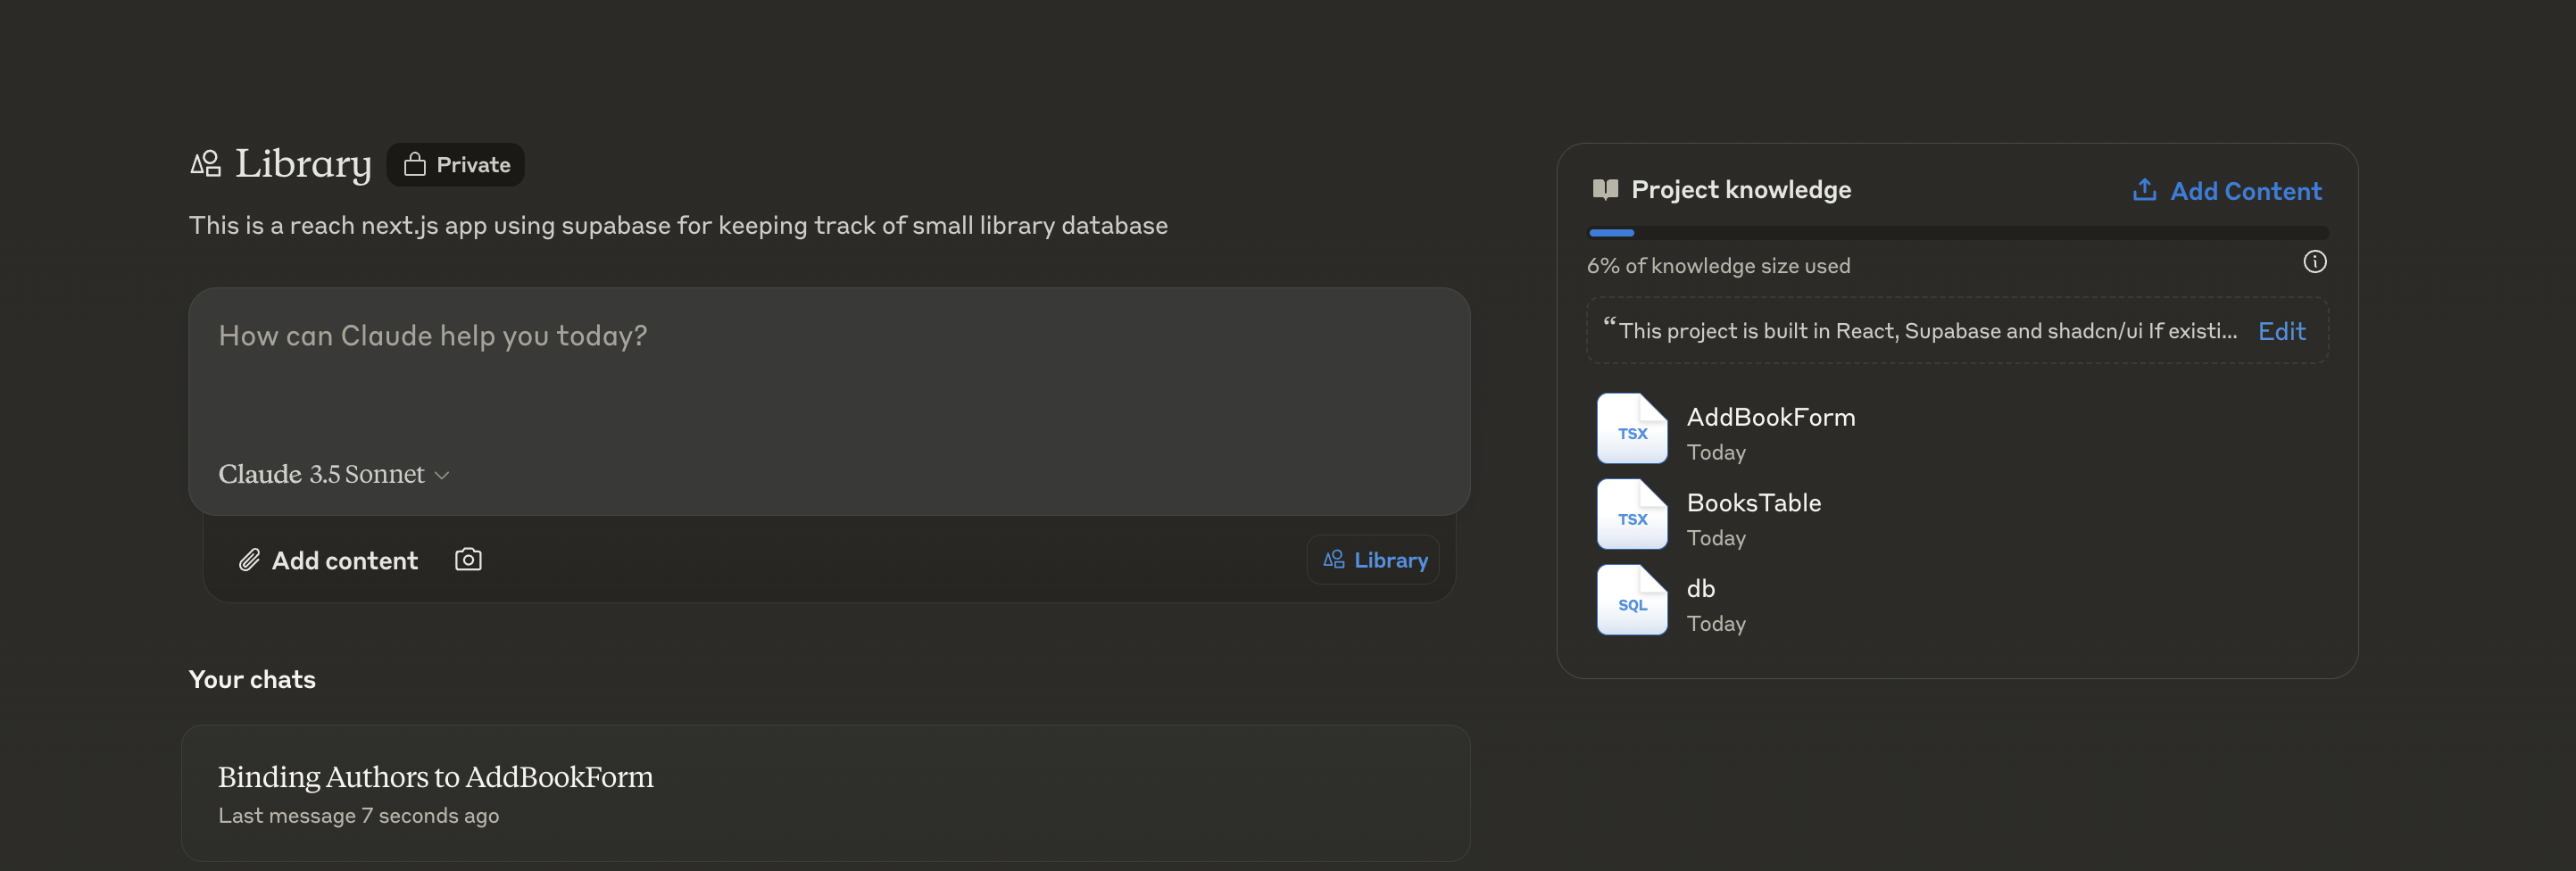
Alternatively, you can use the Zed editor or the Claude Dev plugin for VS Code with the Claude API.

Supabase Local Development
Developing locally with Supabase allows you to work offline and test your database changes before deploying them. Here’s how I set up Supabase for local development:
-
Install Supabase CLI: Install the Supabase CLI by running:
npm install -g supabase -
Initialize Supabase: In your project directory, initialize Supabase:
supabase init -
Start Supabase: Start the local Supabase instance:
supabase startThis will launch the local PostgreSQL database and other Supabase services.
-
Configure Environment Variables: Update your
.envfile with the local Supabase credentials:NEXT_PUBLIC_SUPABASE_URL=http://localhost:54321 NEXT_PUBLIC_SUPABASE_ANON_KEY=your-anon-key -
Migrate Database: Use Supabase migration commands to keep your local and remote databases in sync:
supabase migration new init
supabase migration deploy
By developing locally, you can rapidly iterate without affecting the production database.
Hosting Costs
One of the advantages of using services like Supabase and Cloudflare Pages is the generous free tiers they offer, which can be sufficient for small projects or prototypes.
-
Supabase: Supabase offers a free tier that includes hosting for your database and authentication services. For this small library project, the free tier is more than enough.
-
Cloudflare Pages: Cloudflare Pages provides an excellent platform for hosting static sites and frontend applications. It integrates well with GitHub and offers seamless deployments. The free tier includes:
- Unlimited sites
- Unlimited requests
- Global CDN
- SSL certificates
Hosting our Next.js application on Cloudflare Pages was straightforward and cost-effective.
-
Cloudflare DNS and SSL: Using Cloudflare for DNS management and SSL certificates improves the performance and security of your application at no extra cost.
Overall, the hosting costs for this project were minimal, allowing us to deploy a fully functional application without significant expenses.
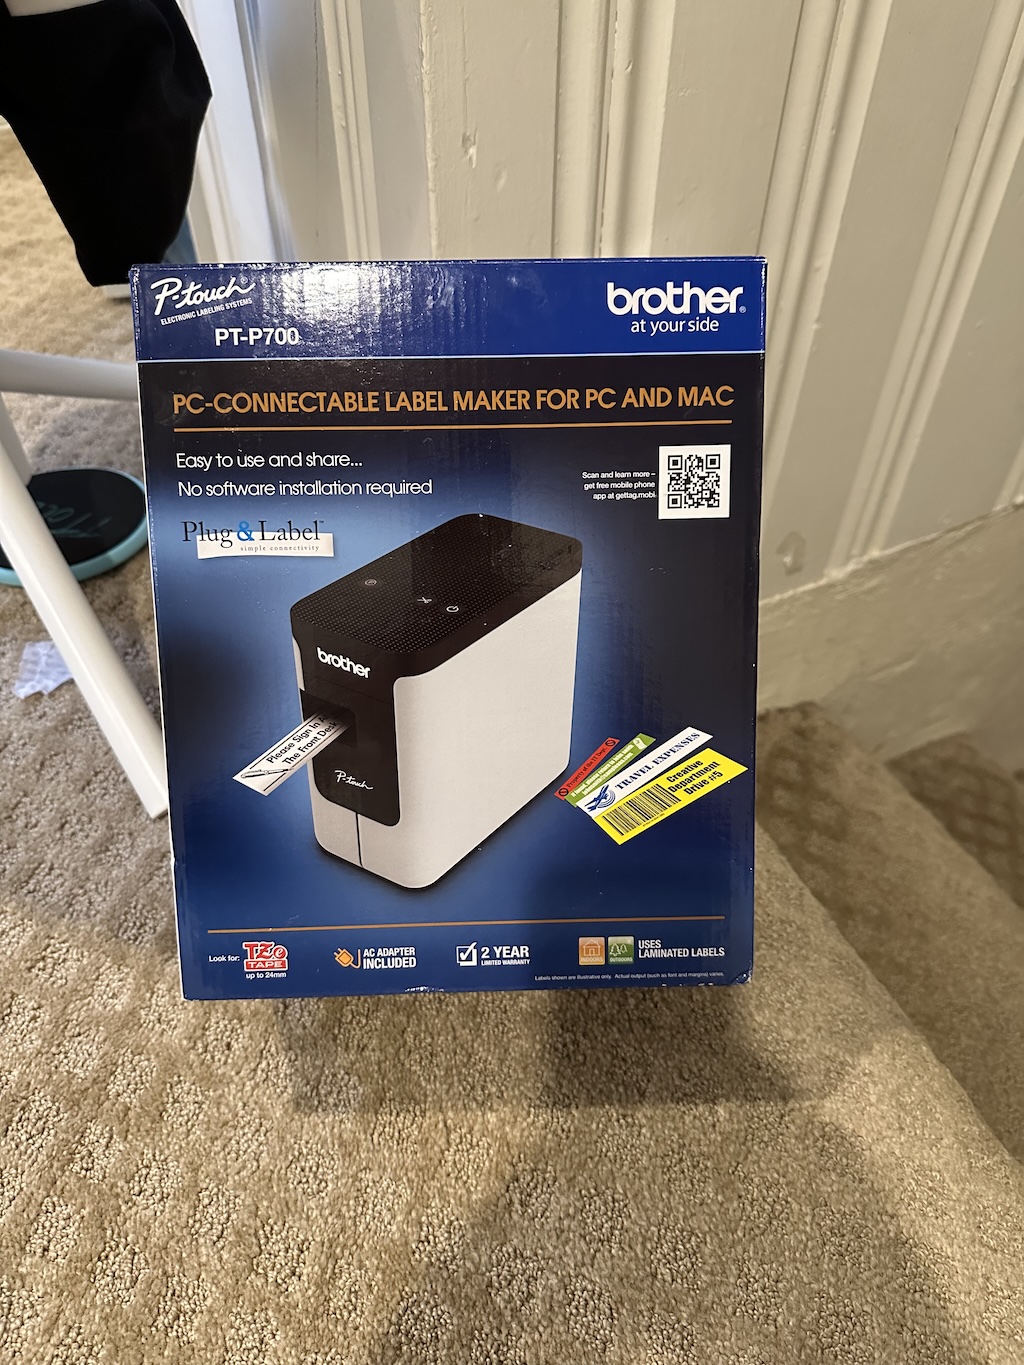
Operations
Creating the software is only one part, you need actually build a system to print the labels for the books and library cards for patrons. I purchased the Brother PT-P700 and donated to the library.
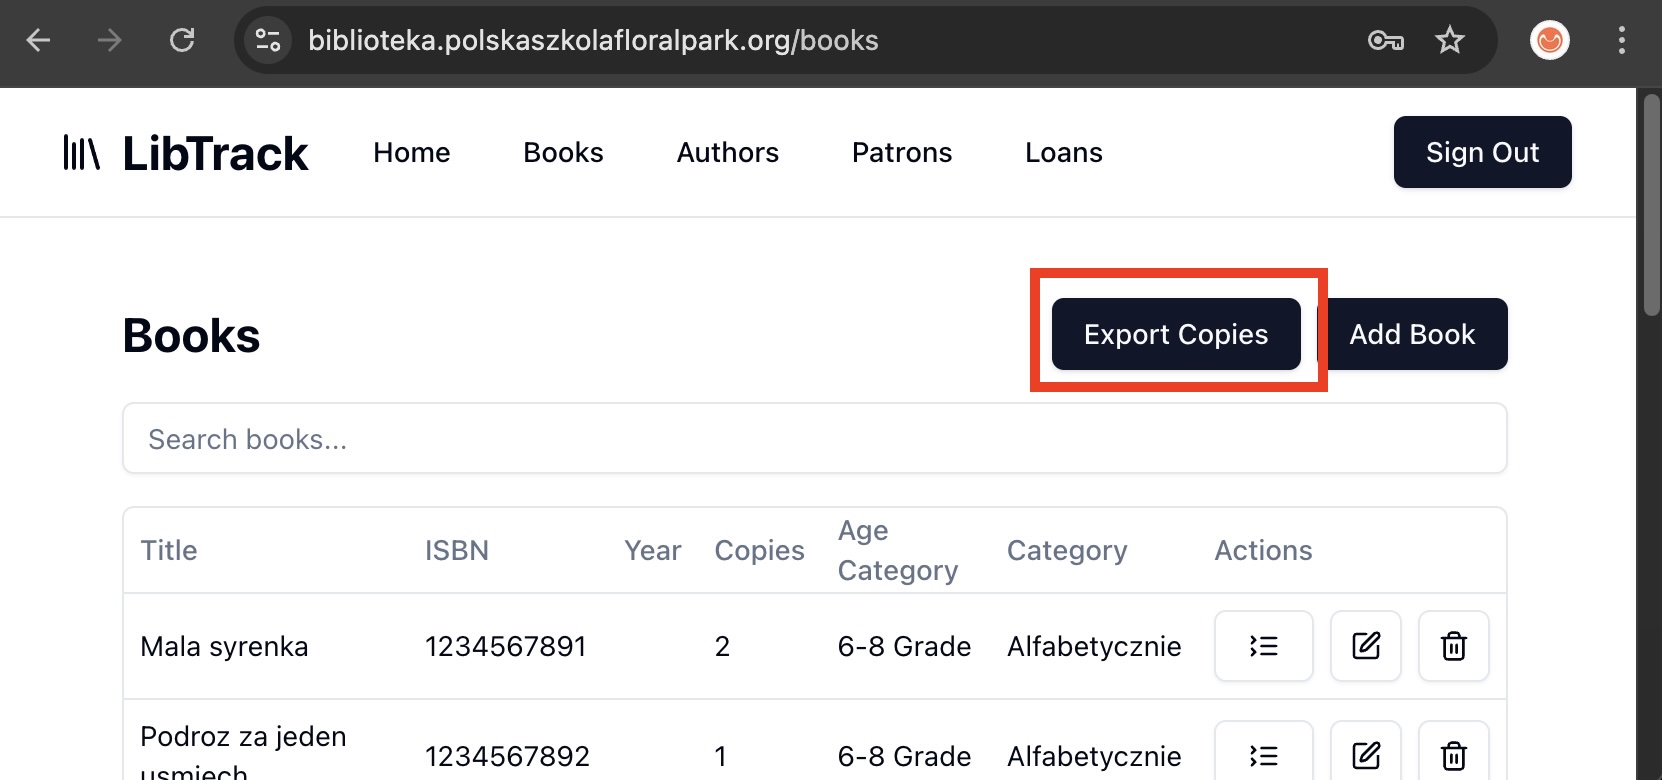
An export CSV option export books and patrons
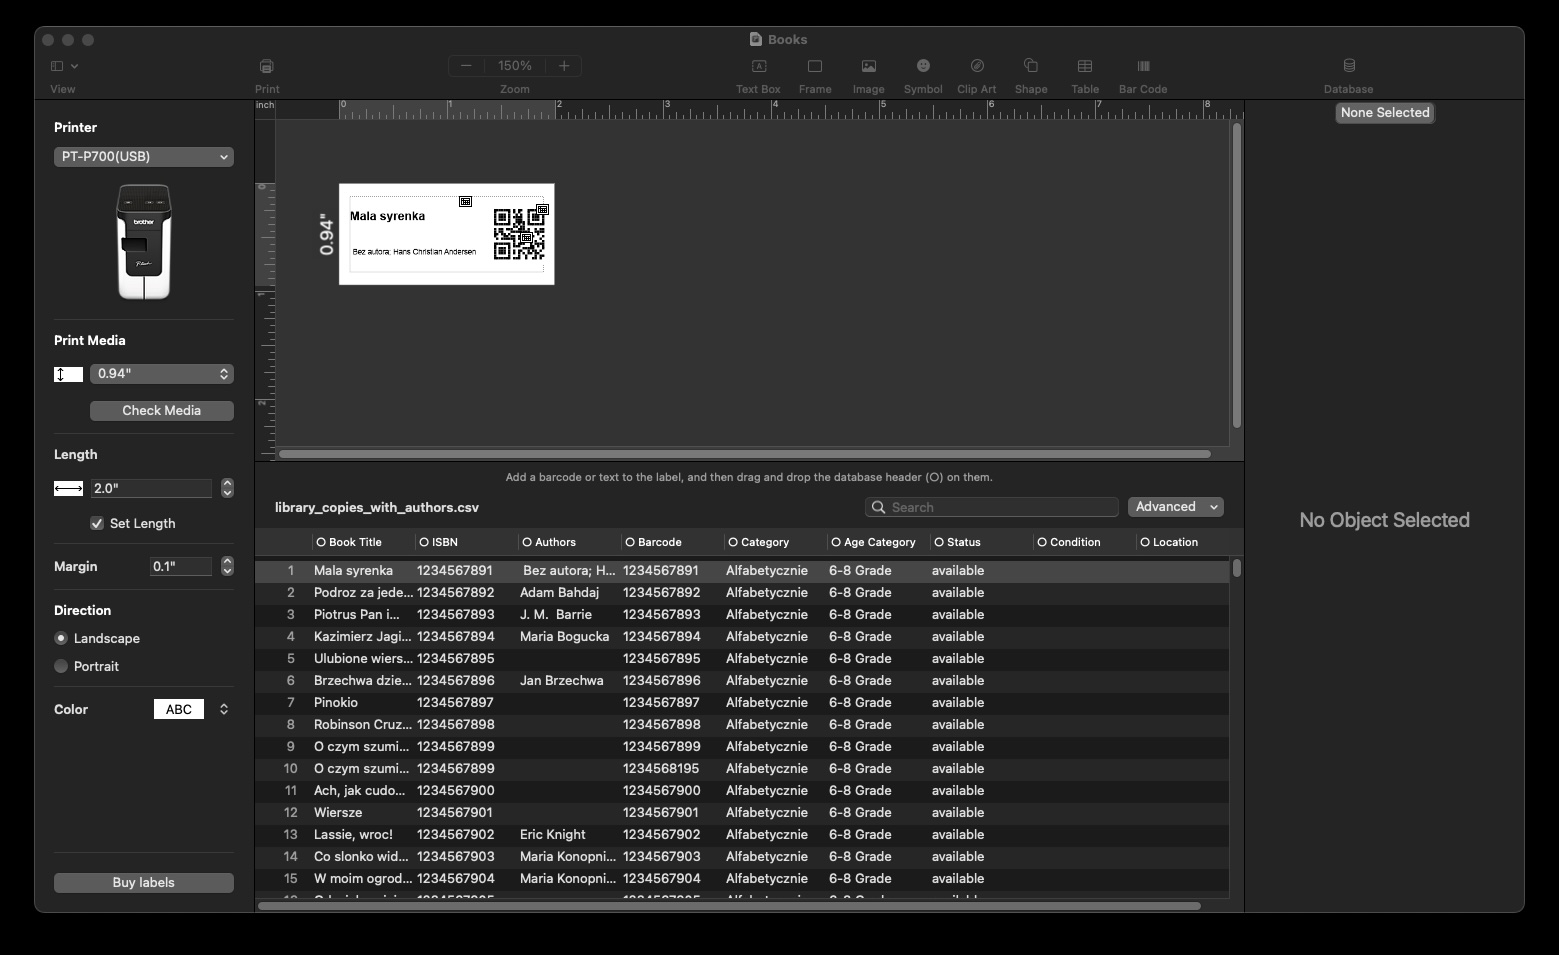
p-touch to actually print the labels
Student Library Cards

Final Thoughts
- AI as a Starting Point: For run-of-the-mill apps, AI is a perfect starting point.
- Importance of Developer Skills: As complexity increases, your existing developer skills are needed.
- Product Focus: Rather than just programming skills, being the product person is more important.
- Avoiding Research Tangents: No more research tangents where you would spend too much time researching something and would lose interest. AI is an excellent tool to smooth out the development process.
- AI as a Co-Programmer: Even though you know how AI works, think of AI as a co-programmer (XP style). You will get better results.