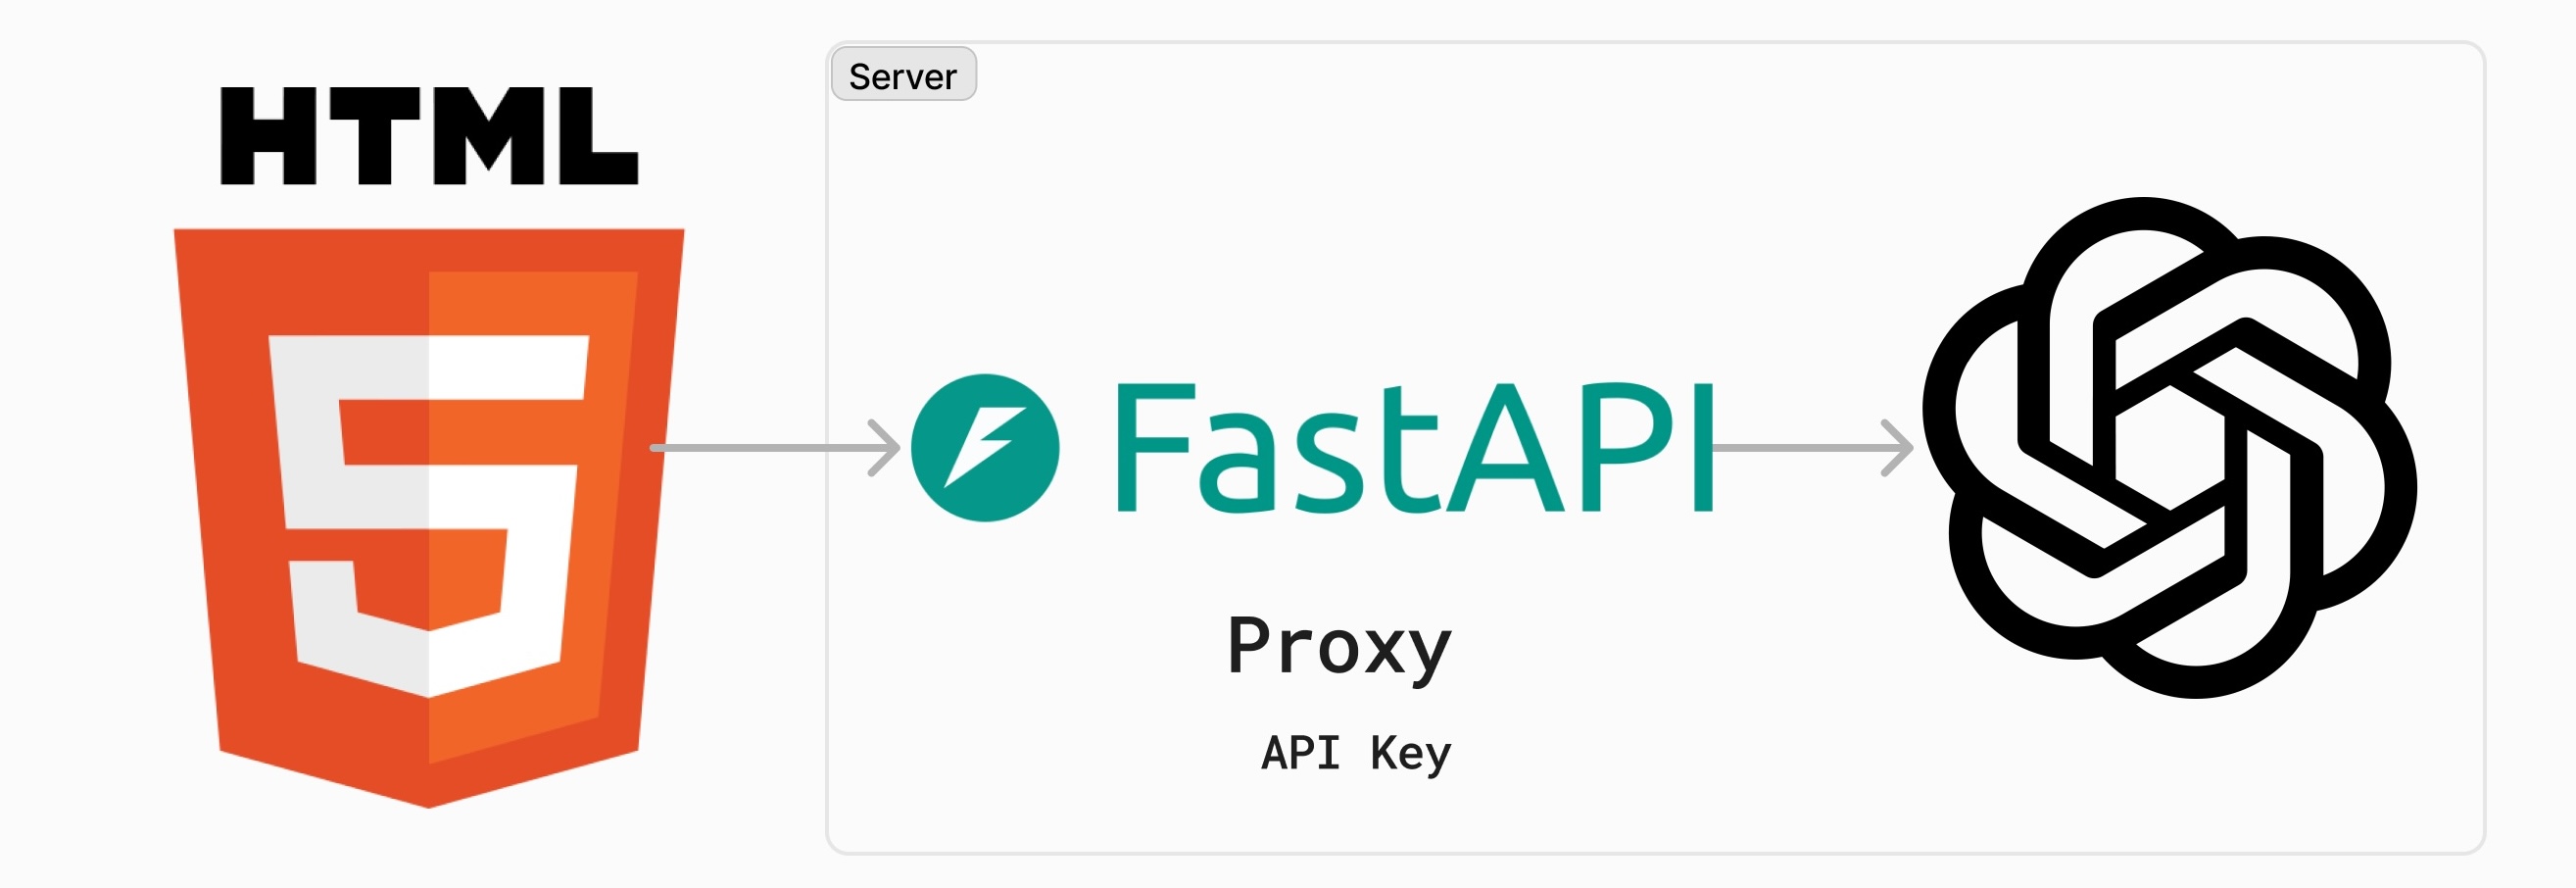
Chat UX - Open AI API Proxy
Sometimes you would like to stream OpenAI API calls through a proxy so you can protect your api key from the front end or implement some other authentication / authorization method.
Here is a starter template just for that situation. I created a simple proof of concept with python fastapi backend

Here is the github url
https://github.com/gavi/chatux
The backend
from fastapi import FastAPI, HTTPException, Request
from fastapi.middleware.cors import CORSMiddleware
from fastapi.responses import StreamingResponse
from openai import AsyncOpenAI
import os
from dotenv import load_dotenv
import logging
import json

# Set up logging
logging.basicConfig(level=logging.INFO)
logger = logging.getLogger(__name__)

load_dotenv()

app = FastAPI()

# Add CORS middleware
app.add_middleware(
    CORSMiddleware,
    allow_origins=["*"],
    allow_credentials=True,
    allow_methods=["*"],
    allow_headers=["*"],
)

OPENAI_API_KEY = os.getenv("OPENAI_API_KEY")
if not OPENAI_API_KEY:
    logger.error("OPENAI_API_KEY is not set in the environment variables")
    raise ValueError("OPENAI_API_KEY is not set")

client = AsyncOpenAI(api_key=OPENAI_API_KEY)
logger.info(f"OPENAI_API_KEY is set: {OPENAI_API_KEY[:5]}...")

@app.post("/chat")
async def chat(request: Request):
    try:
        data = await request.json()
        logger.info(f"Received chat request: {data}")

        async def event_stream():
            try:
                stream = await client.chat.completions.create(
                    model="gpt-3.5-turbo",
                    messages=data['messages'],
                    stream=True
                )
                async for chunk in stream:
                    if await request.is_disconnected():
                        logger.info("Client disconnected, stopping stream")
                        break
                    content = chunk.choices[0].delta.content
                    if content is not None:
                        yield f"data: {json.dumps({'content': content})}\n\n"
            except Exception as e:
                logger.error(f"Error in event stream: {str(e)}")
                yield f"data: {json.dumps({'error': str(e)})}\n\n"

        return StreamingResponse(event_stream(), media_type="text/event-stream")
    except Exception as e:
        logger.error(f"Error in chat endpoint: {str(e)}")
        raise HTTPException(status_code=500, detail=str(e))

if __name__ == "__main__":
    import uvicorn
    uvicorn.run(app, host="0.0.0.0", port=8000)
The front end is all self contained html file with proper markdown rendering, code highlighting and copy button. You can use this as your quick starter project.
This should work with any OpenAI API compatible backends
<!DOCTYPE html>
<html lang="en">
<head>
    <meta charset="UTF-8">
    <meta name="viewport" content="width=device-width, initial-scale=1.0">
    <title>OpenAI Chat App</title>
    <script src="https://cdn.tailwindcss.com"></script>
    <script src="https://cdn.jsdelivr.net/npm/marked/marked.min.js"></script>
    <link rel="stylesheet" href="https://cdn.jsdelivr.net/npm/github-markdown-css/github-markdown.min.css">
    <link rel="stylesheet" href="https://cdnjs.cloudflare.com/ajax/libs/prism/1.24.1/themes/prism.min.css">
    <script src="https://cdnjs.cloudflare.com/ajax/libs/prism/1.24.1/components/prism-core.min.js"></script>
    <script src="https://cdnjs.cloudflare.com/ajax/libs/prism/1.24.1/plugins/autoloader/prism-autoloader.min.js"></script>
</head>
<body class="bg-gray-100 h-screen flex flex-col">
    <div id="chat-messages" class="flex-1 overflow-y-auto p-4"></div>

    <div class="bg-white p-4 border-t border-gray-200">
        <div class="flex max-w-4xl mx-auto">
            <input type="text" id="user-input" class="flex-grow border border-gray-300 rounded-l px-4 py-2" placeholder="Type your message...">
            <button id="send-btn" class="bg-blue-500 text-white px-6 py-2 rounded-r hover:bg-blue-600 transition duration-200">Send</button>
        </div>
    </div>

    <script>
        const chatMessages = document.getElementById('chat-messages');
        const userInput = document.getElementById('user-input');
        const sendBtn = document.getElementById('send-btn');
        let messages = [];

        marked.setOptions({
            breaks: true,
            gfm: true,
            highlight: function (code, lang) {
                if (Prism.languages[lang]) {
                    return Prism.highlight(code, Prism.languages[lang], lang);
                } else {
                    return code;
                }
            }
        });

        function addCopyButtons(element) {
            element.querySelectorAll('pre').forEach(block => {
                if (!block.querySelector('.copy-button')) {
                    const button = document.createElement('button');
                    button.className = 'copy-button absolute top-2 right-2 bg-gray-800 text-white px-2 py-1 rounded text-sm';
                    button.textContent = 'Copy';
                    button.addEventListener('click', () => {
                        navigator.clipboard.writeText(block.textContent).then(() => {
                            button.textContent = 'Copied!';
                            setTimeout(() => {
                                button.textContent = 'Copy';
                            }, 2000);
                        });
                    });
                    block.style.position = 'relative';
                    block.appendChild(button);
                }
            });
        }

        function scrollToBottom() {
            chatMessages.scrollTop = chatMessages.scrollHeight;
        }

        async function sendMessage() {
            const message = userInput.value.trim();
            if (!message) return;

            displayMessage('user', message);
            userInput.value = '';
            messages.push({ role: 'user', content: message });

            try {
                const response = await fetch('http://localhost:8000/chat', {
                    method: 'POST',
                    headers: {
                        'Content-Type': 'application/json'
                    },
                    body: JSON.stringify({ messages: messages })
                });

                if (!response.ok) {
                    throw new Error(`HTTP error! status: ${response.status}`);
                }

                const reader = response.body.getReader();
                const decoder = new TextDecoder('utf-8');
                let aiMessage = '';
                const aiMessageElement = displayMessage('ai', '');

                while (true) {
                    const { done, value } = await reader.read();
                    if (done) break;

                    const chunk = decoder.decode(value);
                    const lines = chunk.split('\n');

                    for (const line of lines) {
                        if (line.startsWith('data:')) {
                            try {
                                const data = JSON.parse(line.slice(5));
                                if (data.content) {
                                    aiMessage += data.content;
                                    aiMessageElement.innerHTML = marked.parse(aiMessage);
                                    addCopyButtons(aiMessageElement);
                                    Prism.highlightAllUnder(aiMessageElement);
                                    scrollToBottom();
                                }
                            } catch (e) {
                                console.error('Error parsing JSON:', e);
                            }
                        }
                    }
                }

                messages.push({ role: 'assistant', content: aiMessage });
            } catch (error) {
                console.error('Error:', error);
                displayMessage('system', 'An error occurred. Please try again.');
            }
        }

        function displayMessage(sender, message) {
            const messageElement = document.createElement('div');
            messageElement.className = `mb-4 ${sender === 'user' ? 'ml-auto' : 'mr-auto'}`;
            const bubbleClass = sender === 'user' ? 'bg-blue-500 text-white' : 'bg-gray-300 text-gray-800';
            const markdownClass = sender === 'ai' ? 'markdown-body' : '';
            messageElement.innerHTML = `
                <div class="w-full ${bubbleClass} rounded-lg px-4 py-2 ${markdownClass}">
                    ${sender === 'ai' ? marked.parse(message) : message}
                </div>
            `;
            chatMessages.appendChild(messageElement);
            scrollToBottom();
            const contentElement = messageElement.querySelector('div');
            if (sender === 'ai') {
                addCopyButtons(contentElement);
                Prism.highlightAllUnder(contentElement);
            }
            return contentElement;
        }

        sendBtn.addEventListener('click', sendMessage);
        userInput.addEventListener('keypress', (e) => {
            if (e.key === 'Enter') sendMessage();
        });
    </script>
</body>
</html>
Get Started Locally
-
Clone the repository:
git clone https://github.com/gavi/chatux.git cd chatux -
Set up the environment:
Option A: Using Python’s built-in venv (virtual environment):
python -m venv venv
source venv/bin/activate  # On Windows, use `venv\Scripts\activate`
Option B: Using Miniconda:
conda create -n chatux python=3.9 conda activate chatux -
Install the required packages:
pip install -r requirements.txt -
Set up your OpenAI API key:
- Create a
.envfile in the project root directory - Add your OpenAI API key to the
.envfile:OPENAI_API_KEY=your_api_key_here
- Create a
Running the Application
-
Start the FastAPI server:
python api.pyThe API will be available at
http://localhost:8000. -
In a separate terminal, serve the HTML file using Python’s built-in HTTP server:
python -m http.server 8080The frontend will be available at
http://localhost:8080. -
Open your web browser and navigate to
http://localhost:8080to use the chat application.
API Endpoints
- POST
/chat: Send chat messages to the OpenAI API and receive streamed responses.